
- Summary
- Pre-Req
- Configuring SCIM 2.0 Application in Okta
- Configuring OIDC Application in Okta
- SDDC Manager IdP Config
- SDDC Manager/vCenter/NSX Role Assignment
- SSO Login
Summary
With the release of VCF 5.1, OKTA has been included as a supported third-party identity broker within VMware Cloud Foundation environments. This blog will demonstrate how to leverage this feature to configure VCF SDDC Manager and Okta, enabling Single Sign-On (SSO) for VCF SDDC Manager, vCenter, and NSX Manager.
Pre-Req
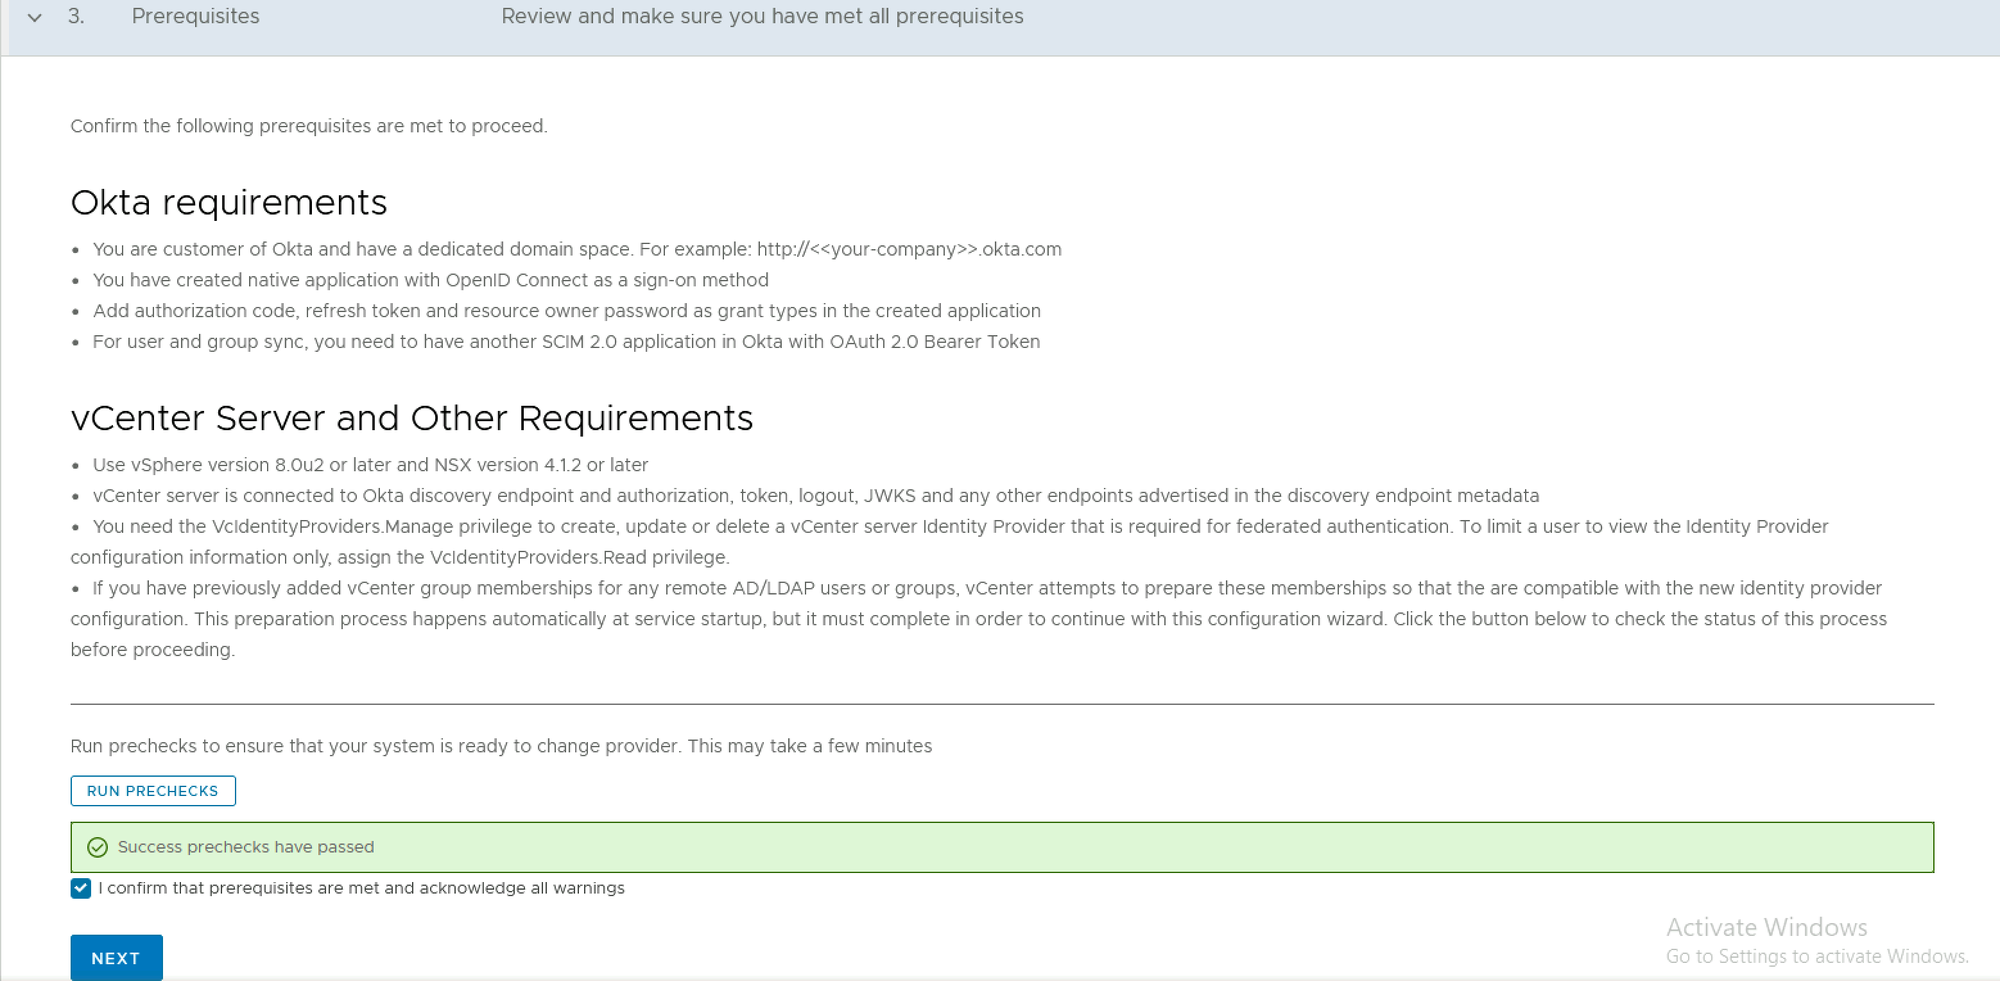
Okta requirements
- You are a customer of Okta and have a dedicated domain space. For example https://your-company-tenant-name.okta.com
- You have created a native application with OpenID Connect as a sign-on method
- Add authorization code, refresh token and resource owner password as grant types in the created application
- For user and group sync, you need to have another SCIM 2.0 application in Okta with OAuth 2.0 Bearer Token
vCenter Server and Other Requirements
- Use vSphere version 8.0u2 or later and NSX version 4.1.2 or later
- vCenter server is connected to Okta discovery endpoint and authorization, token, logout, JWKS and any other endpoints advertised in the discovery endpoint metadata
- You need the VcIdentityProviders.Manage privilege to create, update or delete a vCenter server Identity Provider that is required for federated authentication. To limit a user to view the Identity Provider configuration information only, assign the VcIdentityProviders.Read privilege.
- If you have previously added vCenter group memberships for any remote AD/LDAP users or groups, vCenter attempts to prepare these memberships so that the are compatible with the new identity provider configuration. This preparation process happens automatically at service startup, but it must complete in order to continue with this configuration wizard. Click the button below to check the status of this process before proceeding.
Configuring SCIM 2.0 Application in Okta
Create the SCIM 2.0 Test App (OAuth Bearer Token) Application
- Log in to the Okta Admin Console.

2. Browse the app catalog for SCIM 2.0 Test App (OAuth Bearer Token), and click Add Integration.

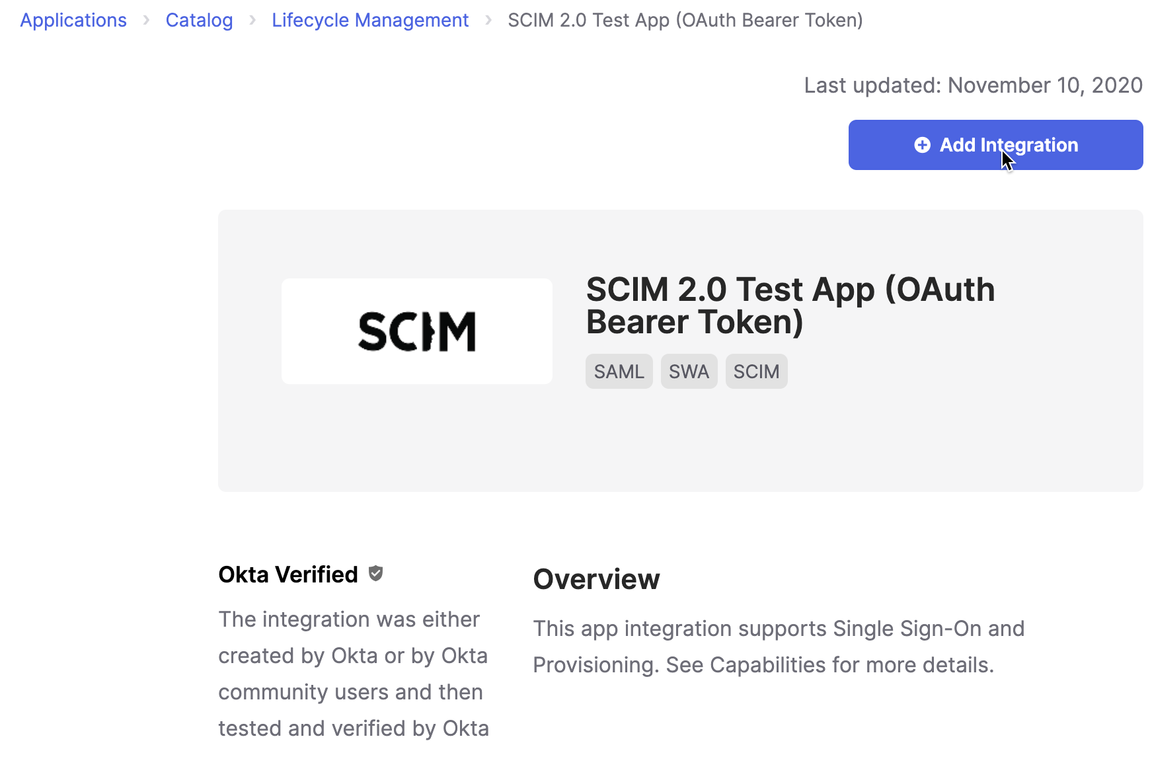
3. Use the following settings when creating the SCIM 2.0 application:
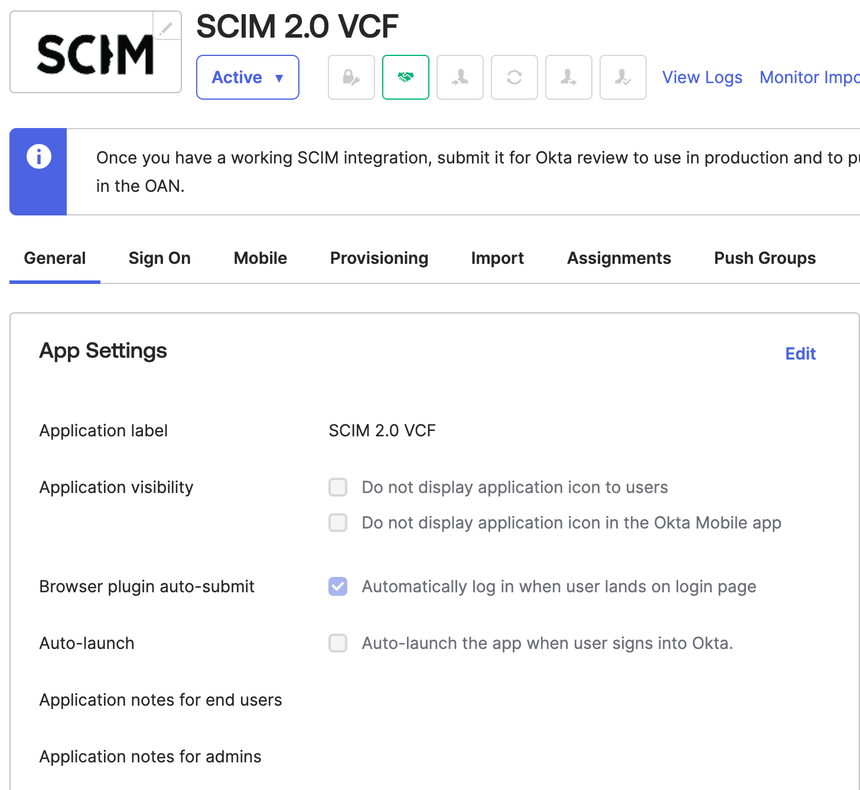
- Enter an appropriate name for the SCIM 2.0 application
- In the General settings · Required page, leave Automatically log in when user lands on login page checked.
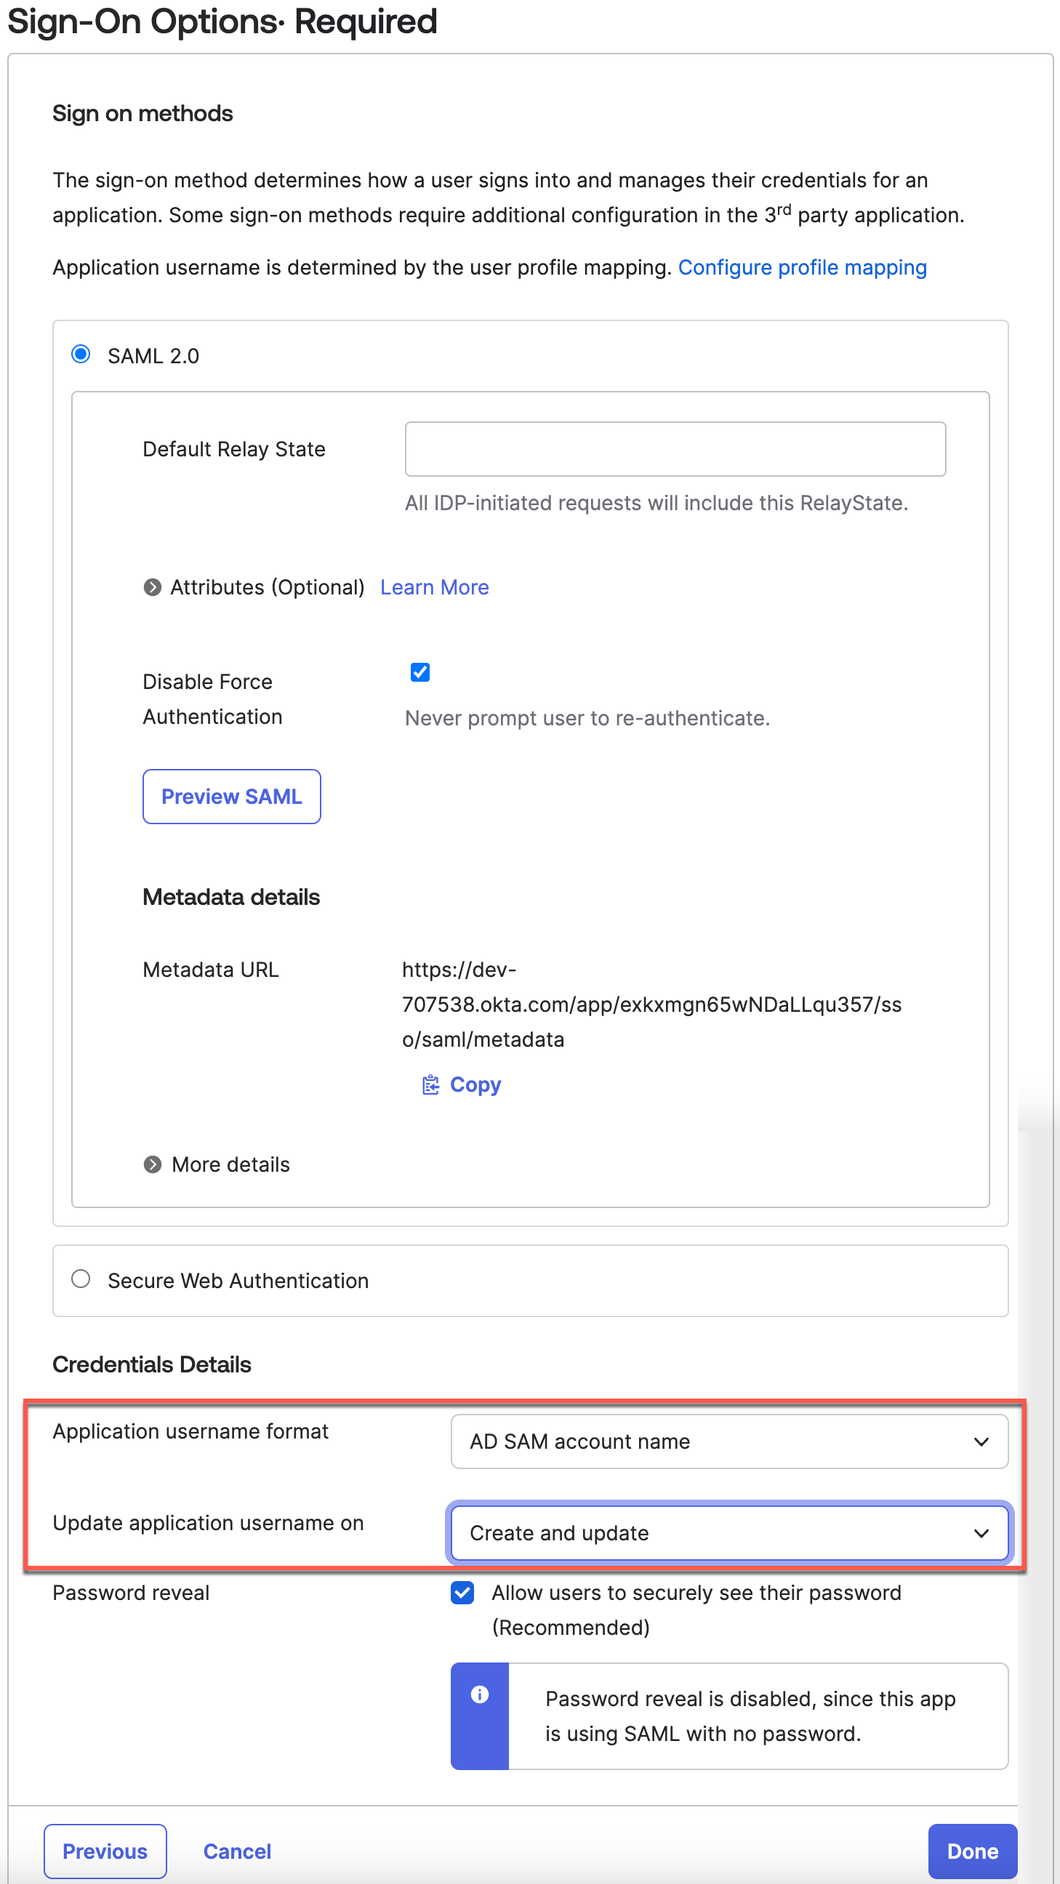
- In the Sign-on Options page:
- For Sign-on methods, leave SAML 2.0 checked.
- For Credential Details:
- Application username format: Select AD SAM Account name.
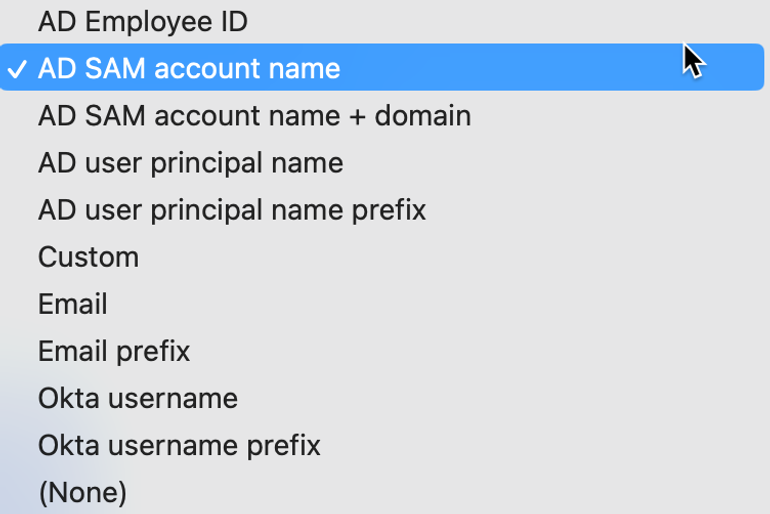
💡 Please note that, as of now, the AD user principal name is not a supported username format.
- Update application username on: Leave Create and update selected.
- Password reveal: Leave Allow users to securely see their password selected.
💡 Please note that we can only continue the configuration in Sections 3.2 and 3.4 until we have completed all configurations in Section 5.
SCIM 2.0 API Integration
- Assign users and groups to the SCIM 2.0 application to push from your Active Directory to vCenter Server:
- In the Okta SCIM 2.0 application, under Provisioning, click Configure API integration.
- Check the Enable API integration checkbox.
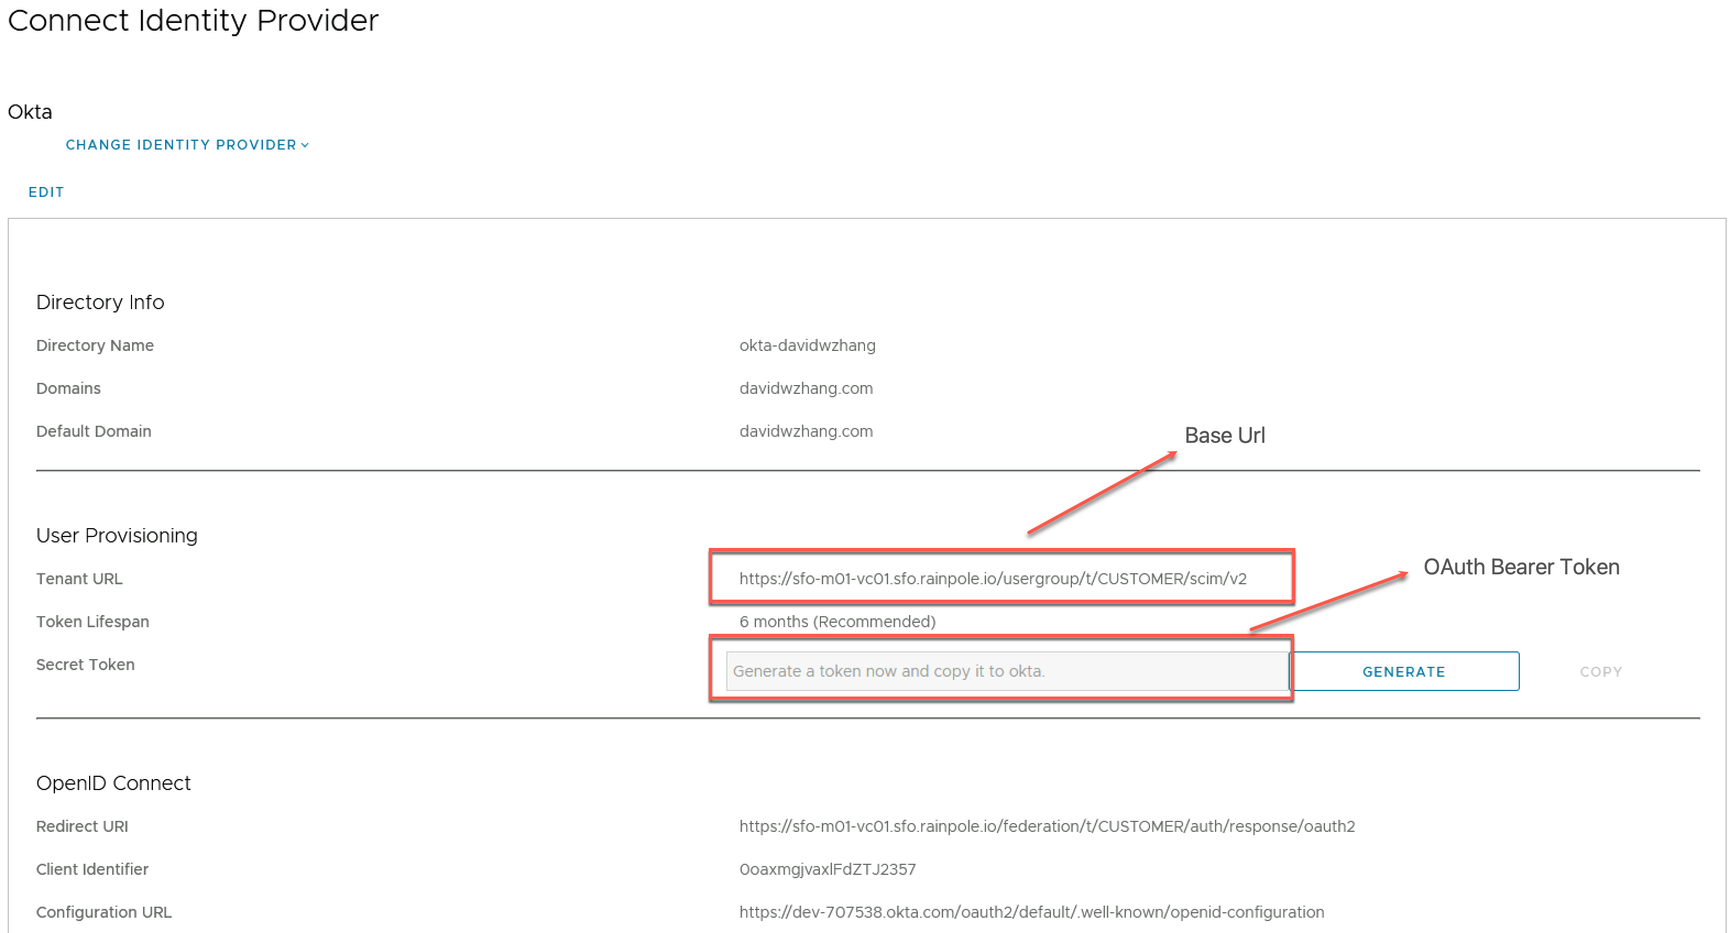
- Enter the SCIM 2.0 Base Url and OAuth Bearer Token. SDDC Manager calls the SCIM 2.0 Base Url the “Tenant URL,” and the OAuth Bearer Token the “Secret Token.”
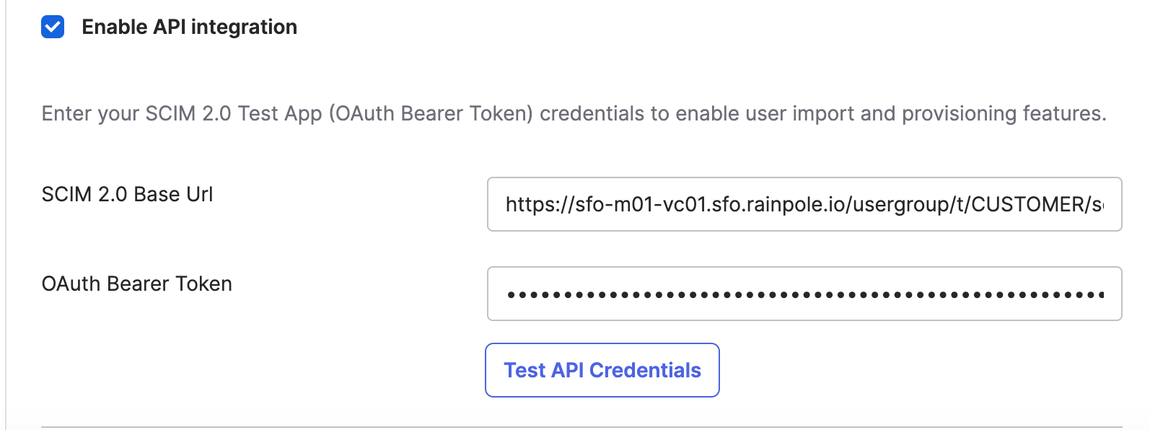
Because my vCenter is an internal system, I use an Internet-accessible HAProxy as a reverse proxy to forward the SCIM user provisioning requests from Okta to vCenter. The HAProxy’s domain name is haproxy01.davidwzhang.cloud so I have changed the original base URL to the following.
https://haproxy01.davidwzhang.cloud/usergroup/t/CUSTOMER/scim/v2💡 You can use a load balancer, such as NSX ALB, to achieve the same functionality as HAProxy in this scenario.
You may have noticed that the vCenter and HAProxy are in two different domains. This is to demonstrate a common practice in enterprise environments: keeping internal systems in an internal domain and public-facing systems in a public DNS domain.
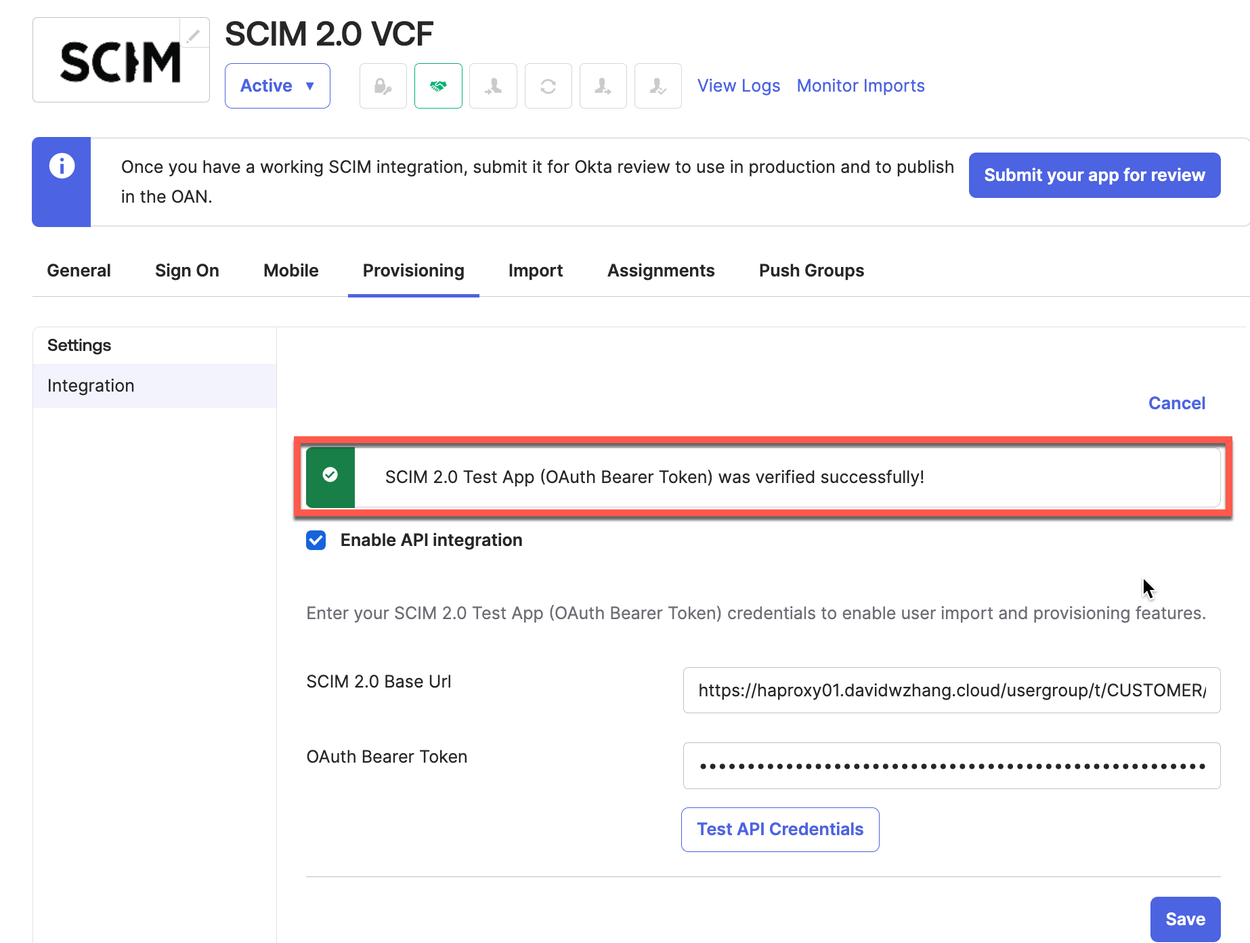
After successfully testing the API Credentials, we can save the configuration. Below is my HAProxy configuration for your reference.
HAProxy Config
My HAProxy config for your reference:
frontend vcenter-frontend-443
        bind 10.1.1.190:443 ssl crt /etc/haproxy/vcenter-frontend-443.pem
        option http-server-close
        option forwardfor header 10.1.1.190,haproxy01.davidwzhang.cloud
        stats uri /haproxy?stats
        acl scim_path path -i -m sub /usergroup/t/CUSTOMER/scim/v2/
        use_backend vcenter-backend-443 if scim_path

backend vcenter-backend-443
        mode http
        http-request set-header Host sfo-m01-vc01.sfo.rainpole.io
	server sfo-m01-vc01.sfo.rainpole.io 172.16.11.70:443 ssl check inter 1000 verify none
Configure the User and Group Provisioning to VCF
Go to Provisioning and perform the following changes: Check Create Users, Update User Attributes, and Deactivate Users but not check Sync Password.

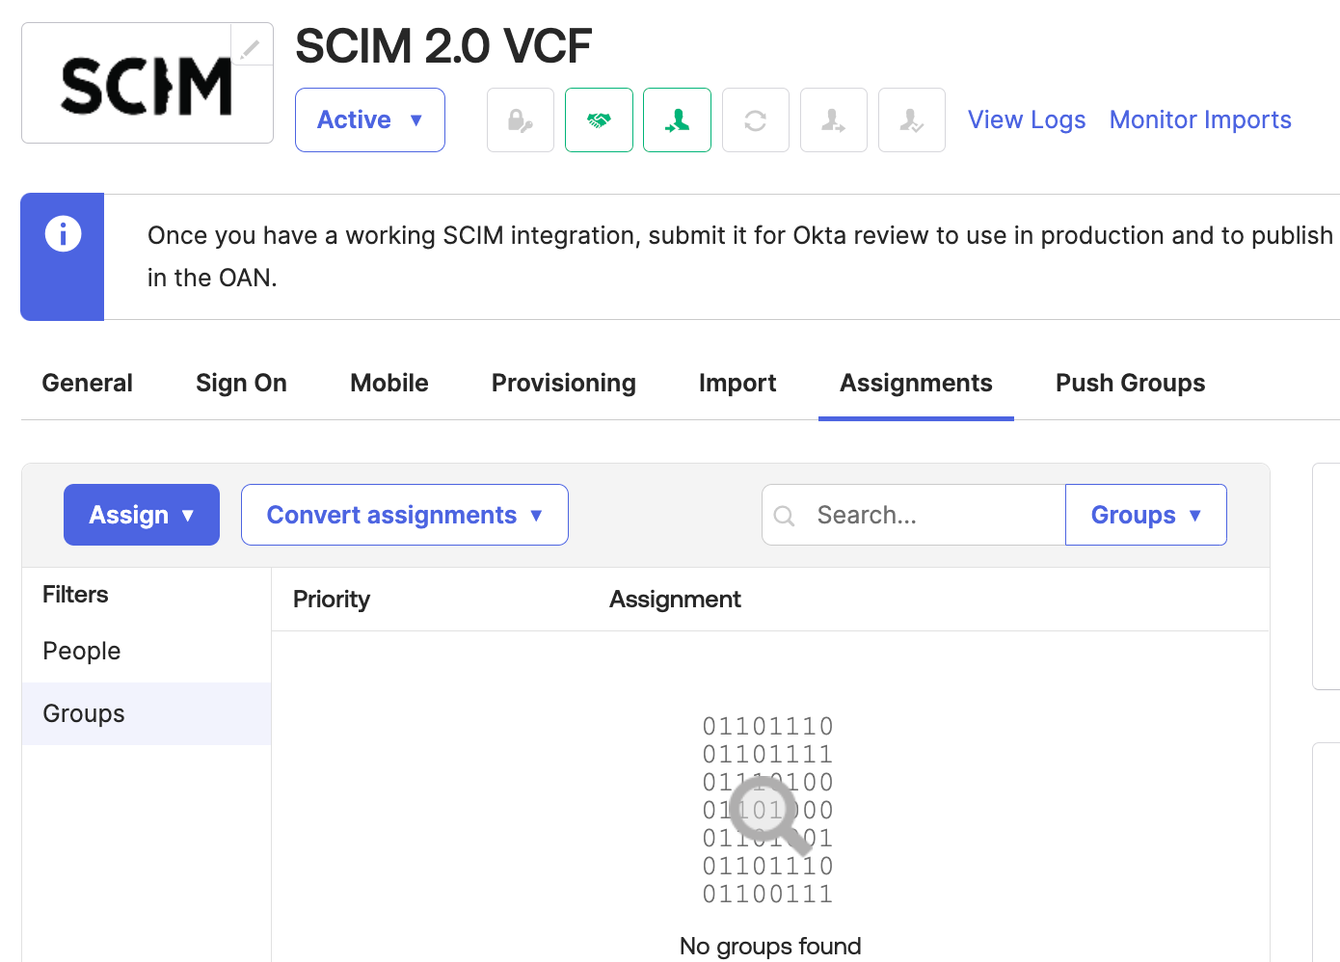
Assign two AD groups (vcf-admin and vcf-ops) to this SCIM 2.0 application.
Push AD groups to VCF. Firstly, select the group by name.
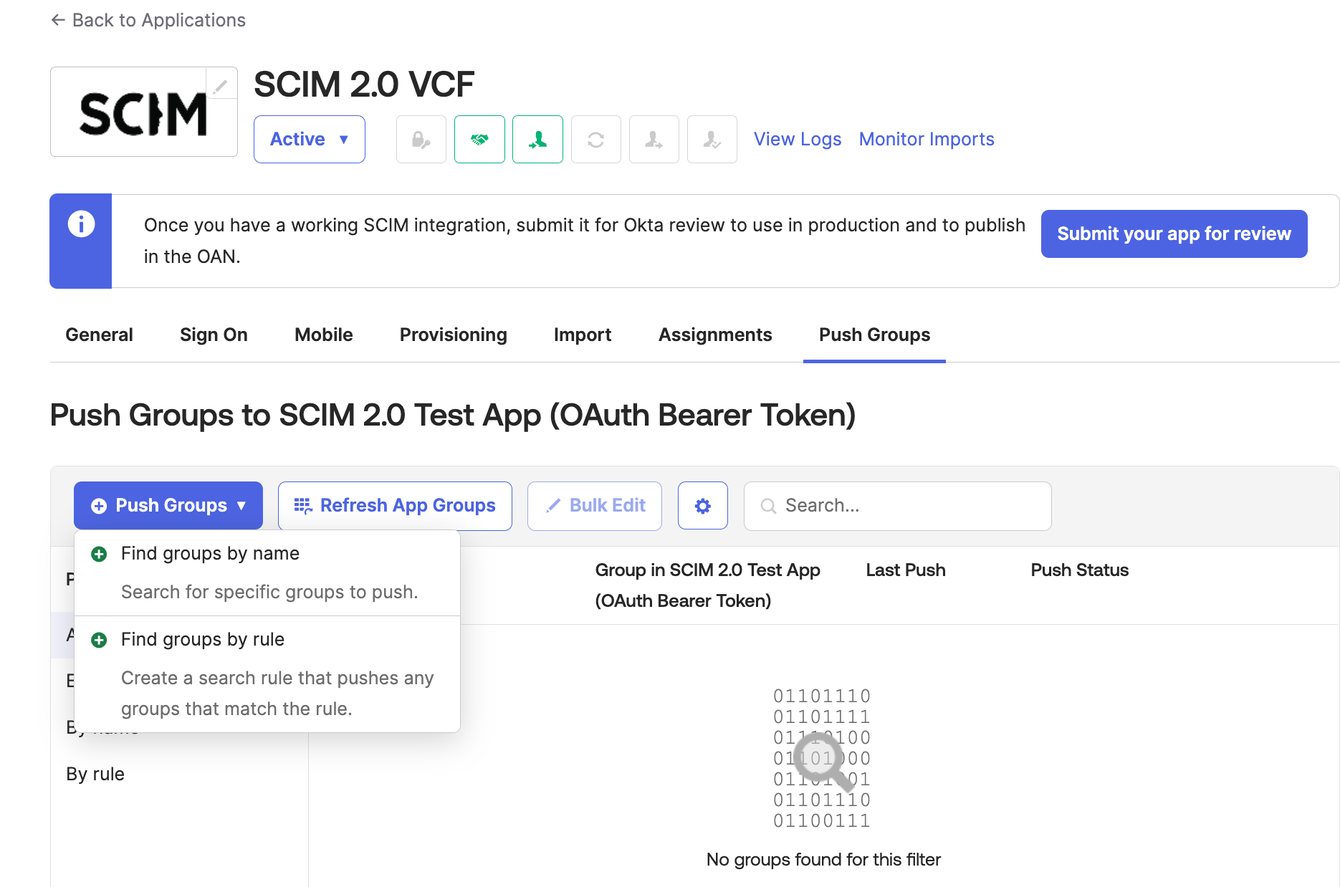
Push two groups from Okta to VCF SDDC Manager.
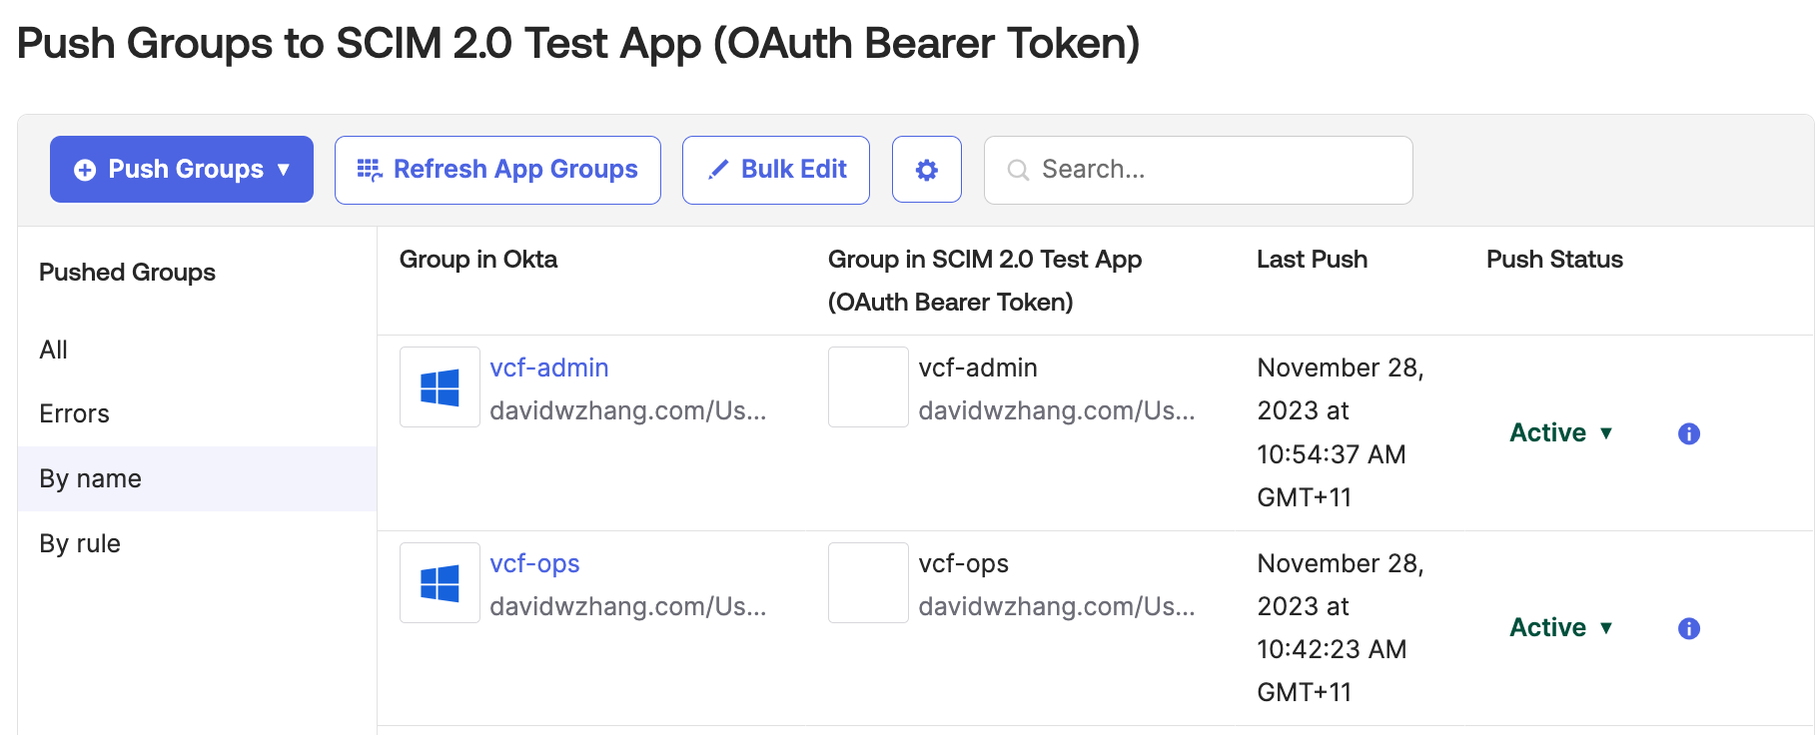
In VCF SDDC Manager, we can see the AD groups and users created.
Configuring OIDC Application in Okta
Create OIDC Application
When creating the OpenID Connect application in the Create a new app integration wizard:
- Select OIDC – OpenID Connect as the Sign-in method.
- Select Native Application as the Application type.
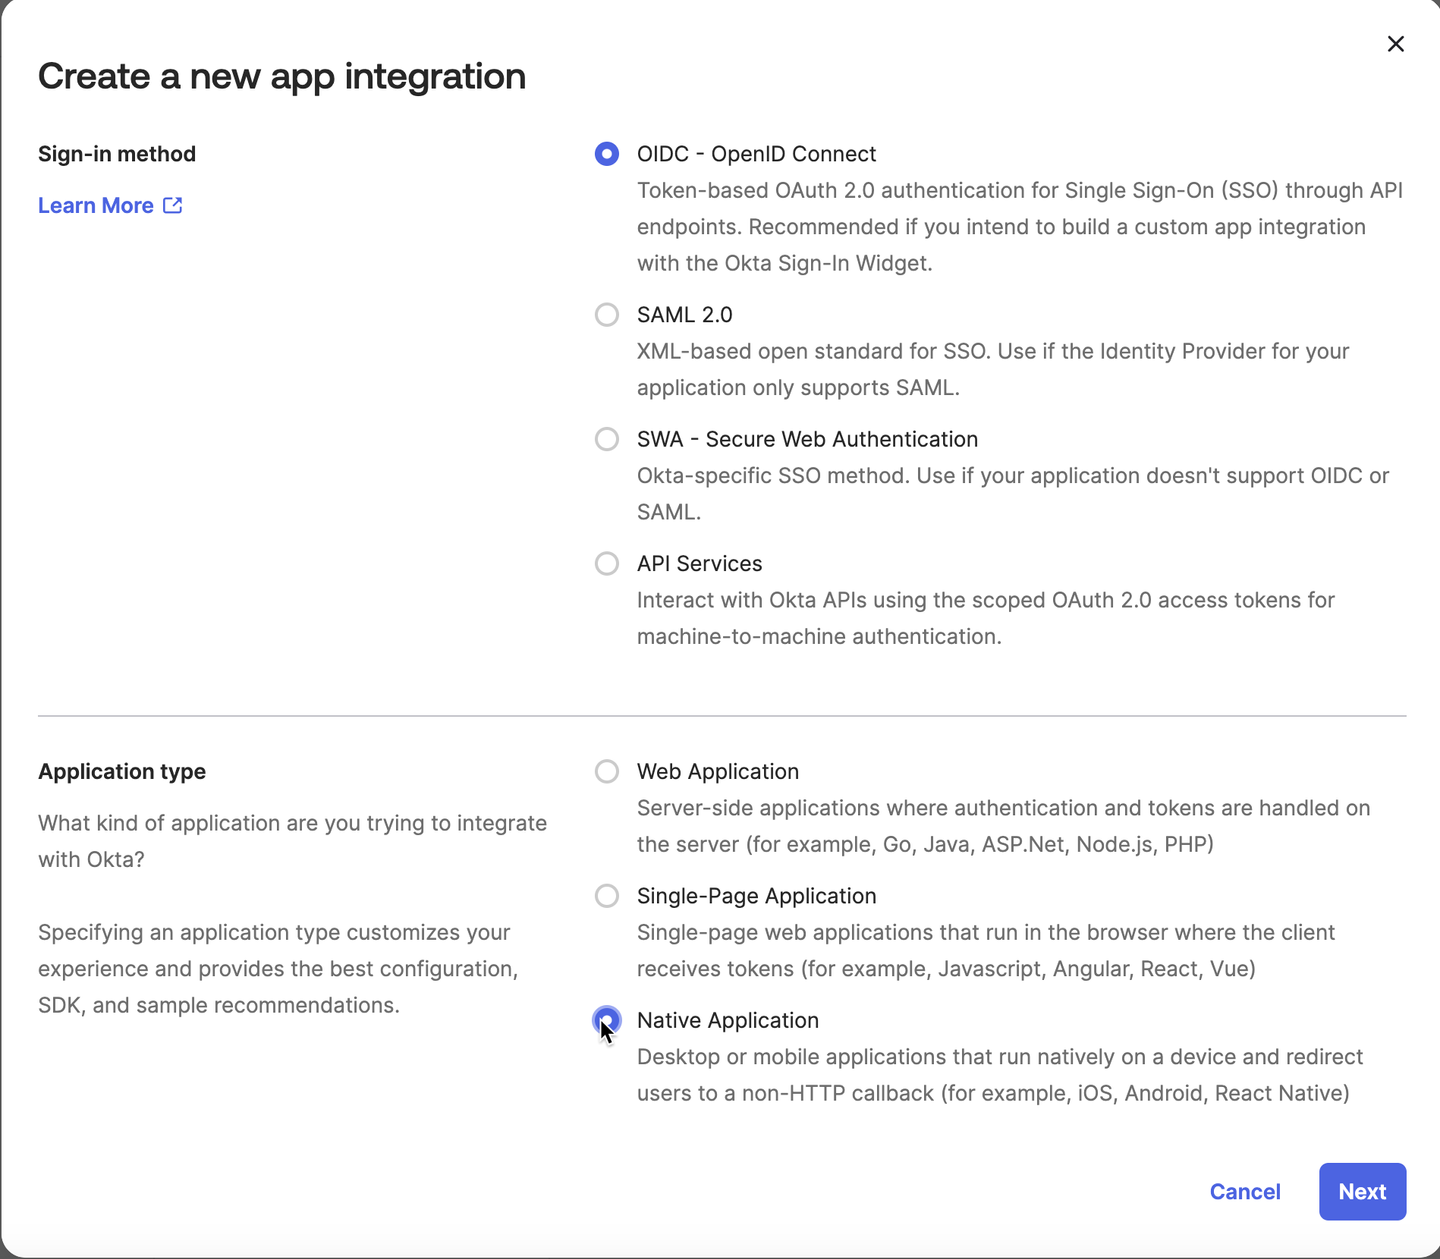
- Enter an appropriate name for the OpenID Connect application, for example, vcf-okta-app
- In General Settings, leave Authorization Code checked, and check Refresh Token and Resource Owner Password.
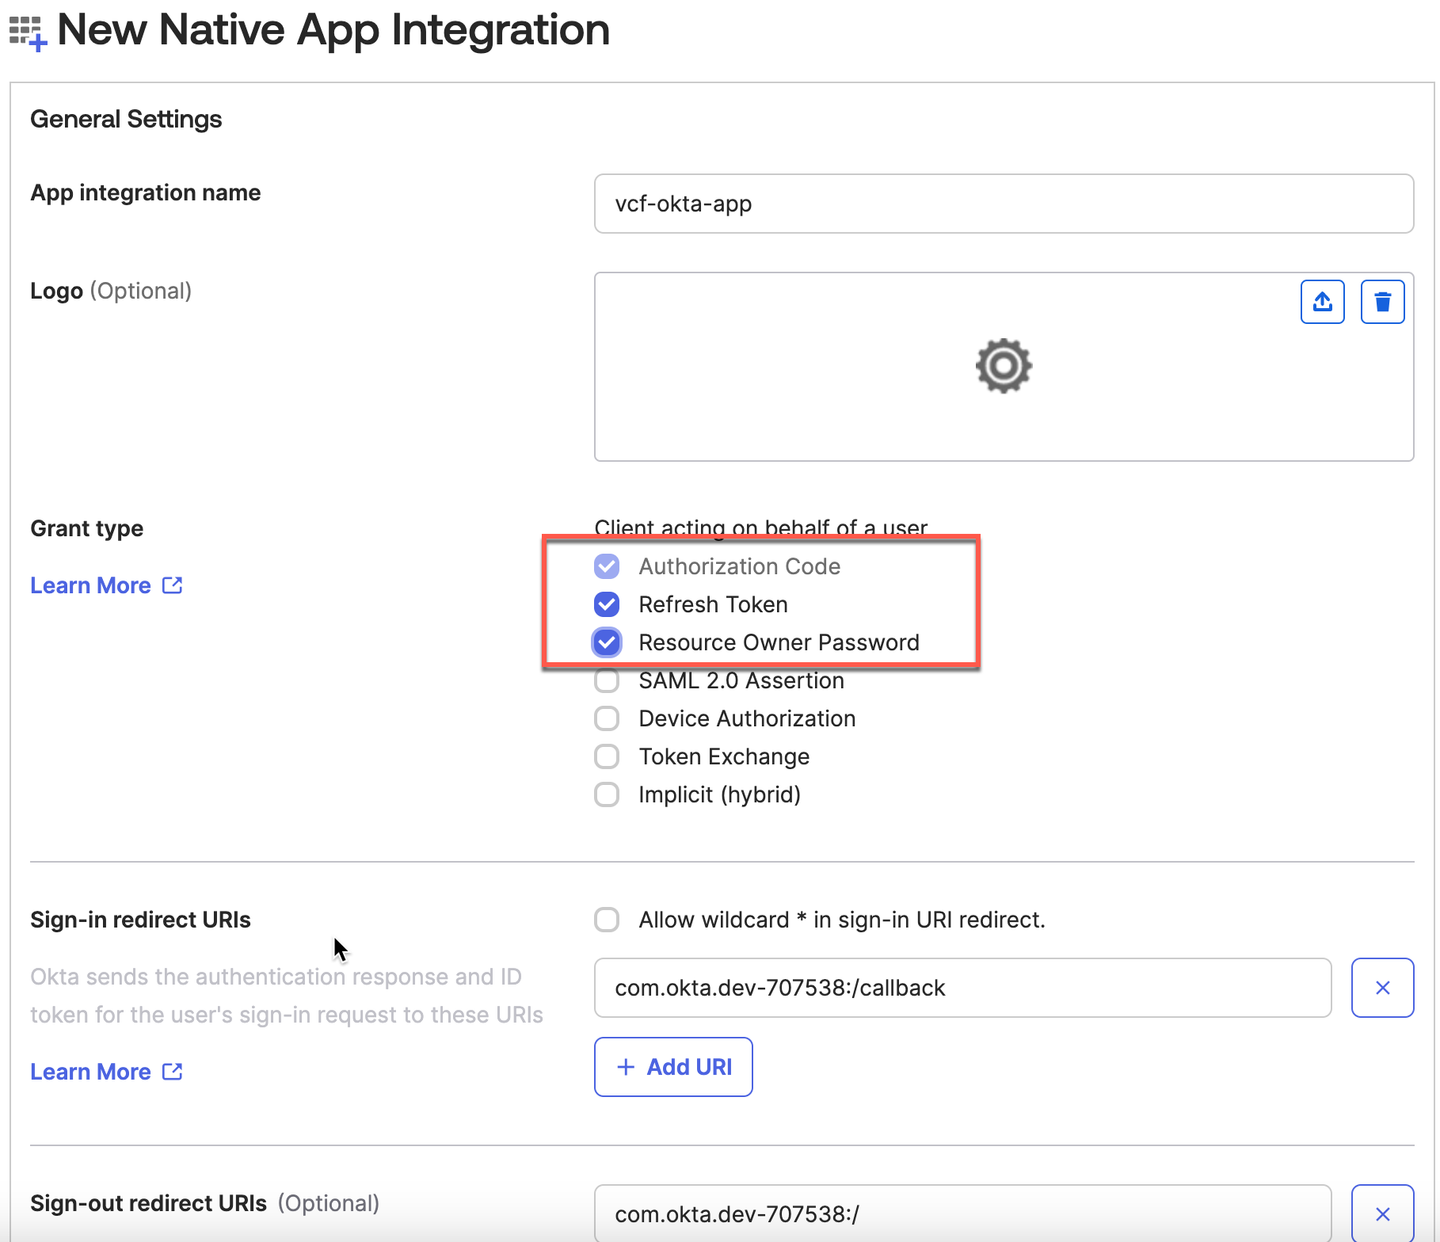
- For now, ignore Sign-in redirect URIs and Sign-out redirect URIs. (you will input these values later.)
- When selecting how to control access, you can select Skip group assignment for now if you want.
Generate the Client Secret
After the OpenID Connect application is created, generate the Client Secret.
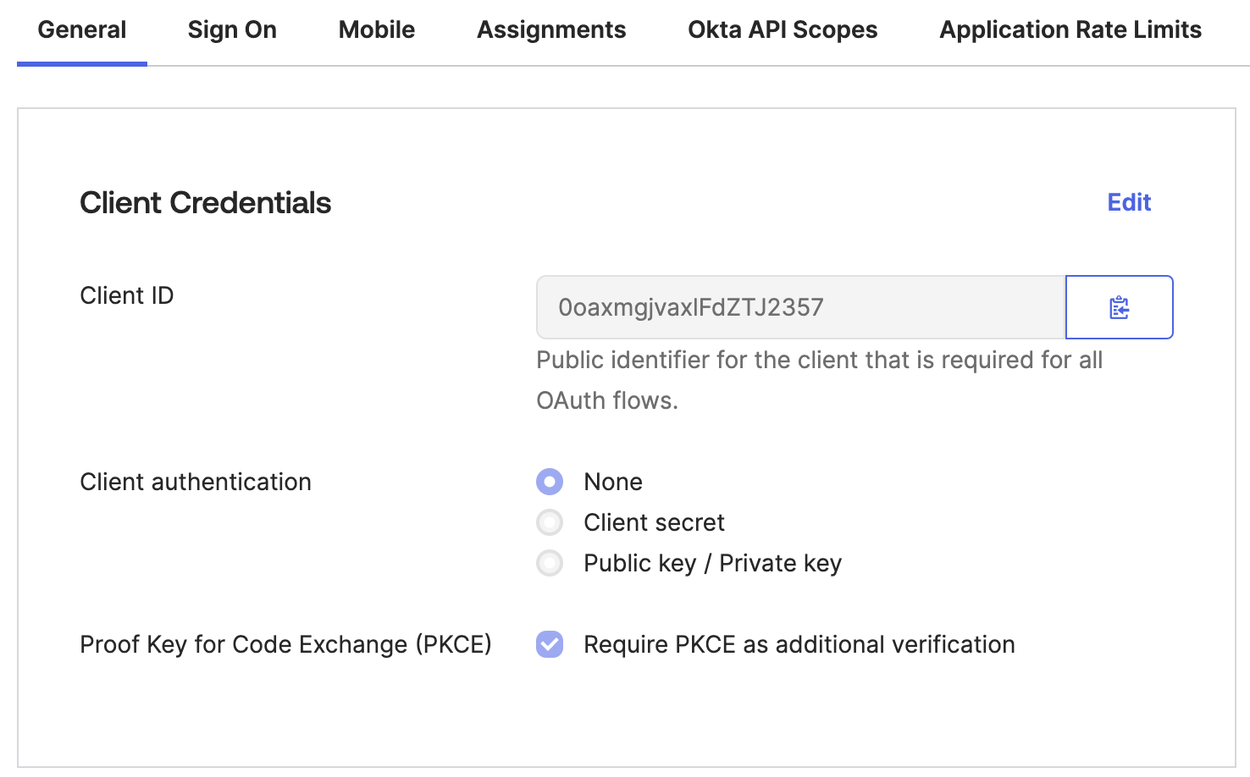
- Select the General tab.
- In Client Credentials, click Edit and for Client Authentication check Client Secret.
- For Proof Key for Code Exchange (PKCE), uncheck Require PKCE as additional verification.
- Click Save. The Client Secret is generated.
- Copy both the Client ID and Client Secret and save them for use in creating the Okta identity provider in SDDC Manager.
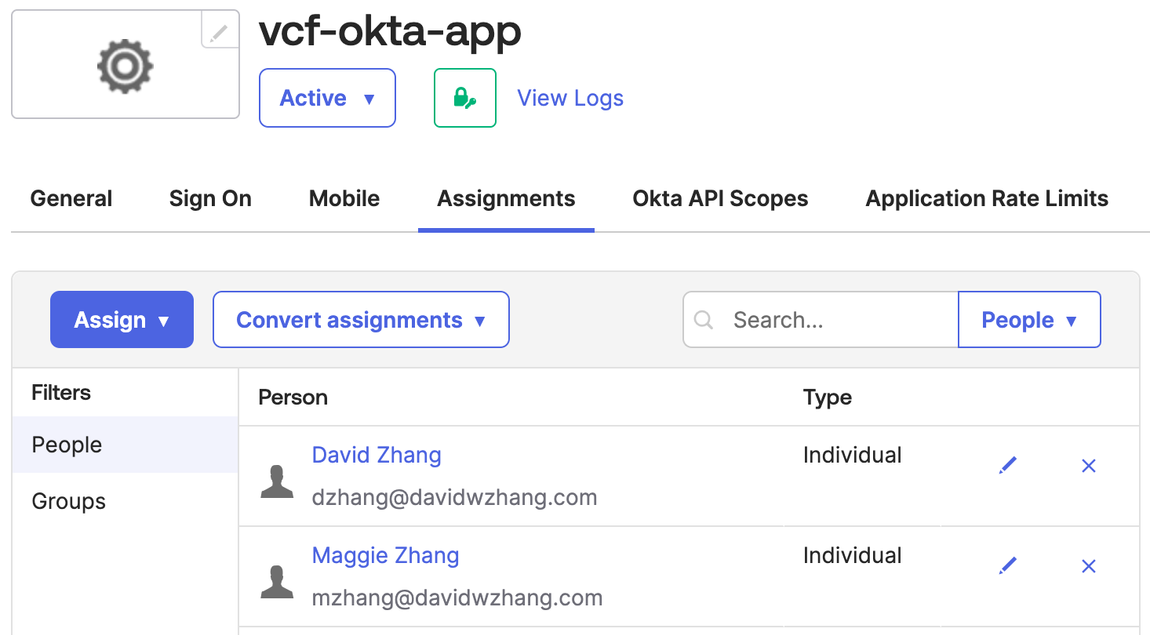
Assign users and groups to the OpenID Connect application.
- Select the Assignments tab and select Assign to Groups from the Assign drop-down.
- Enter the group to search for in the Search field.
- Select the group and click Assign.
- Search for, select, and assign, other groups as needed.
- When done assigning groups, click Done. To view the users that have been assigned, click People under Filters on the Assignment page. Okta assigns the group(s).
SDDC Manager IdP Config
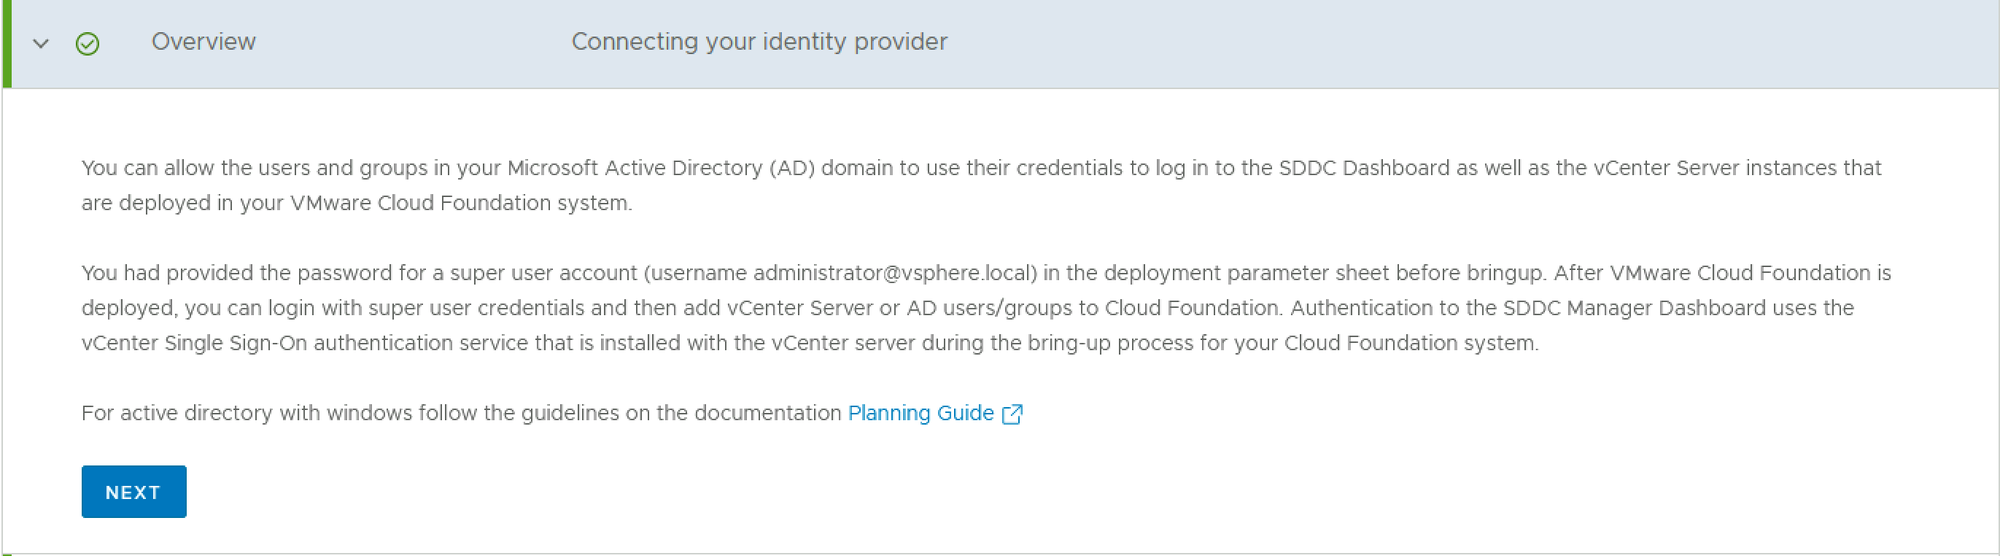
Step 1: Overview
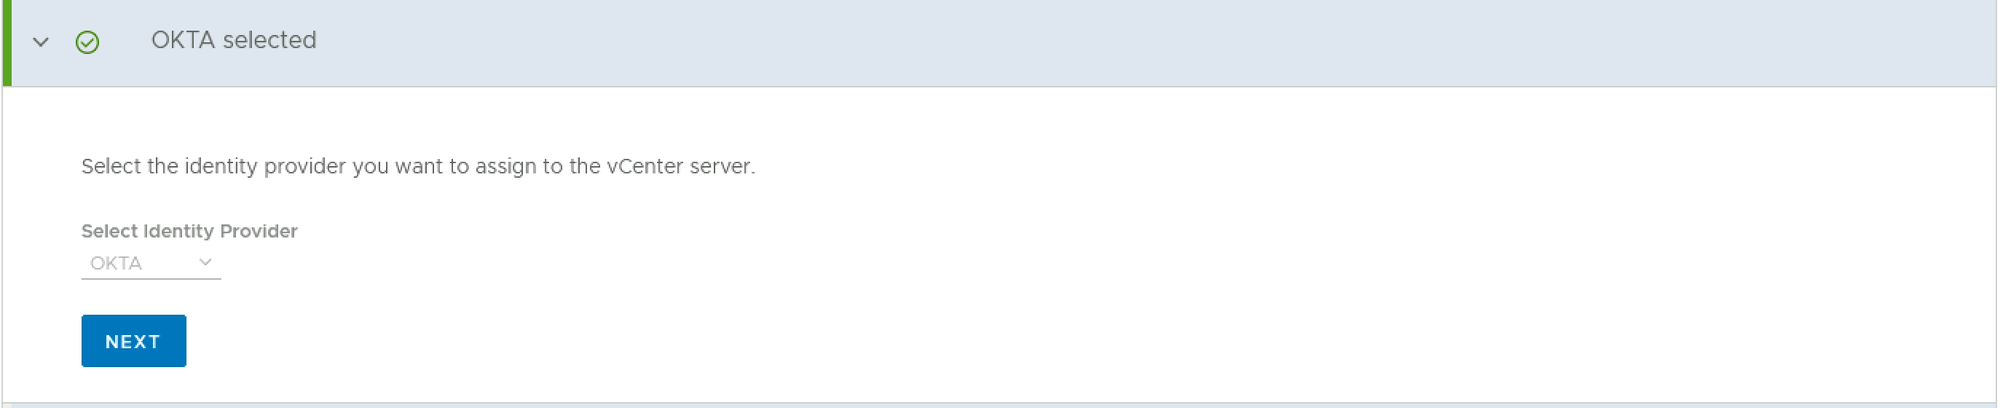
Step 2: Select Okta as Identity Provider
Step 3: Prerequisites Check
Step 4: Provide Directory Information
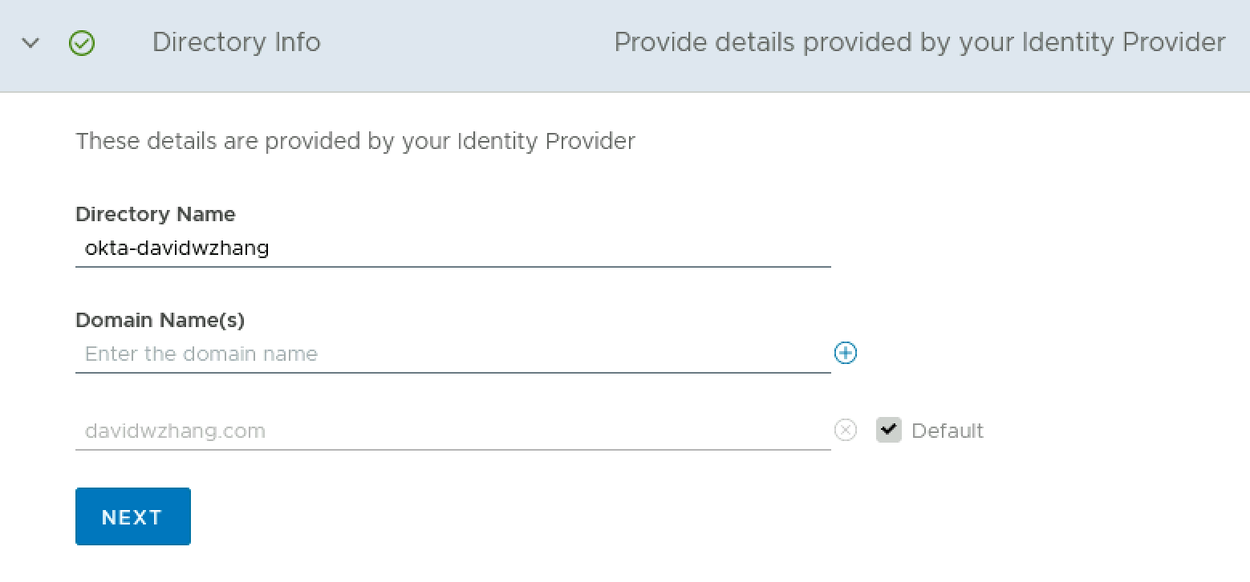
💡 Note you can’t use dot(.) in the directory name
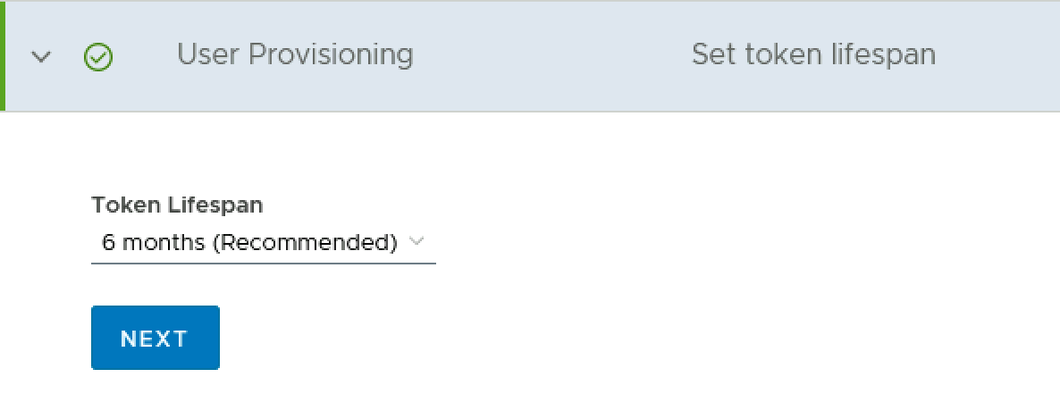
Step 5: Set Token life for User Provisioning
Step 6: OpenID Connect Configuration
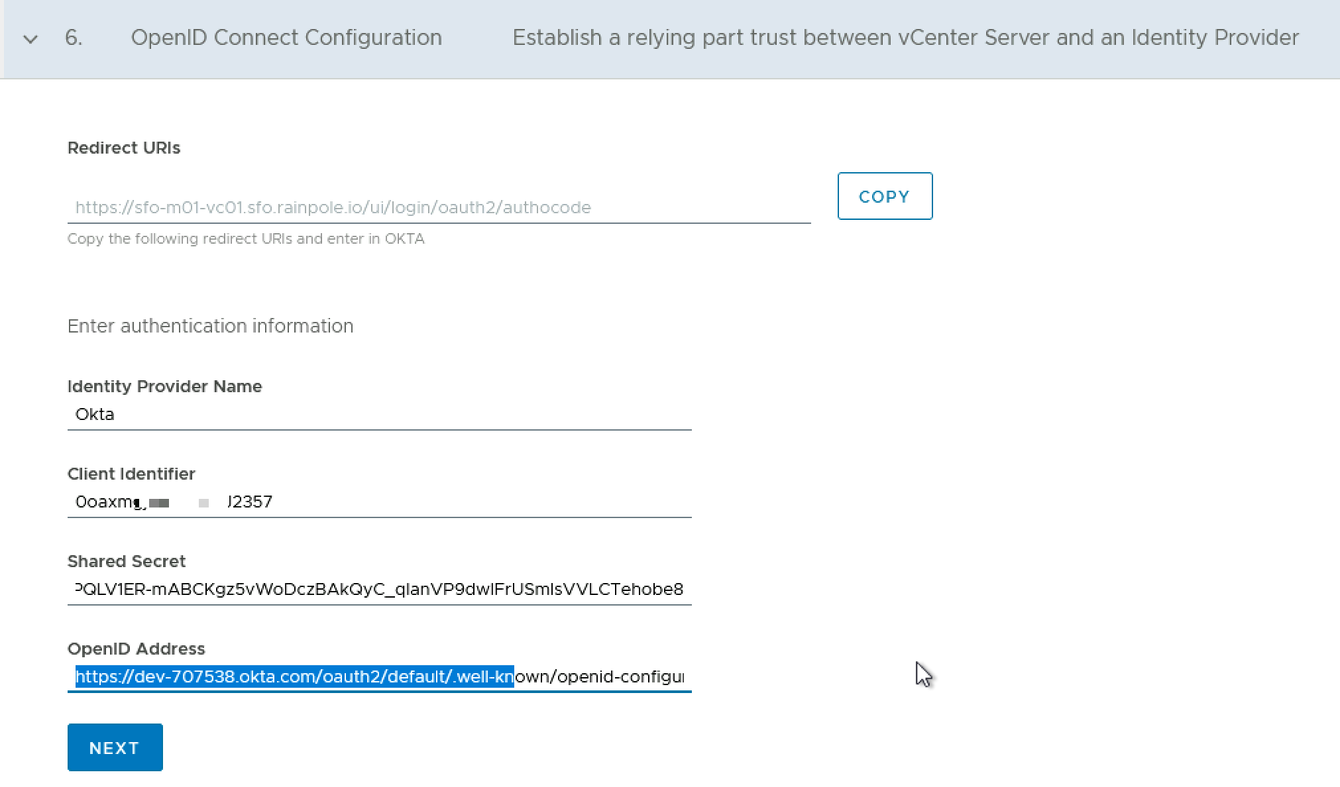
Copy the recorded Client ID and Client Secret from Section 4.2 into the ‘Client Identifier’ and ‘Shared Secret’ fields, respectively.
Also, you need to copy the generated OpenID Address into the Sing-in redirect URL of the created Okta application: vcf-okta-app in Okta Console.
https://dev-707538.okta.com/oauth2/default/.well-known/openid-configuration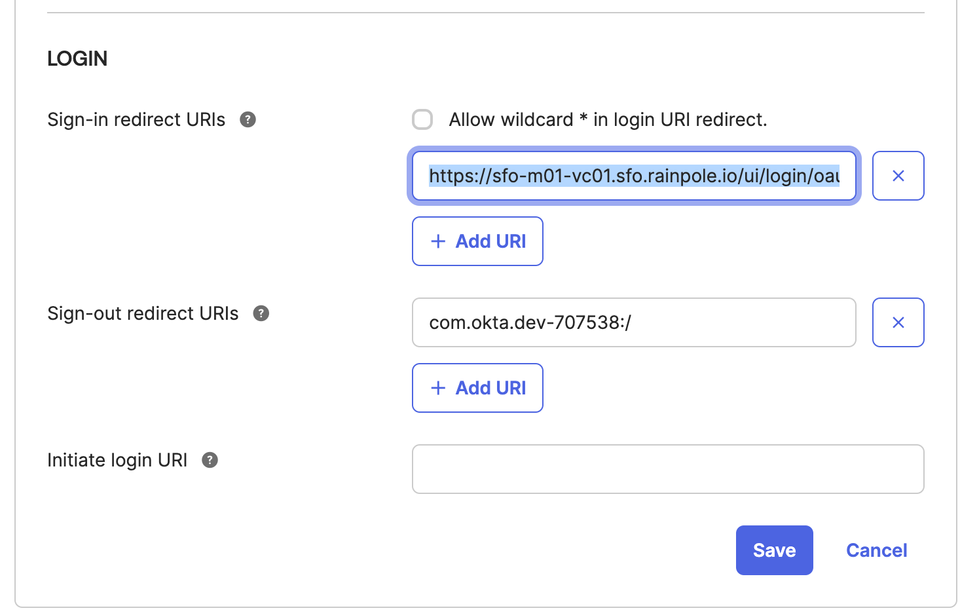
You can get the OpenID configuration details by accessing the OpenID Address.
Step 7: Review the Configuration
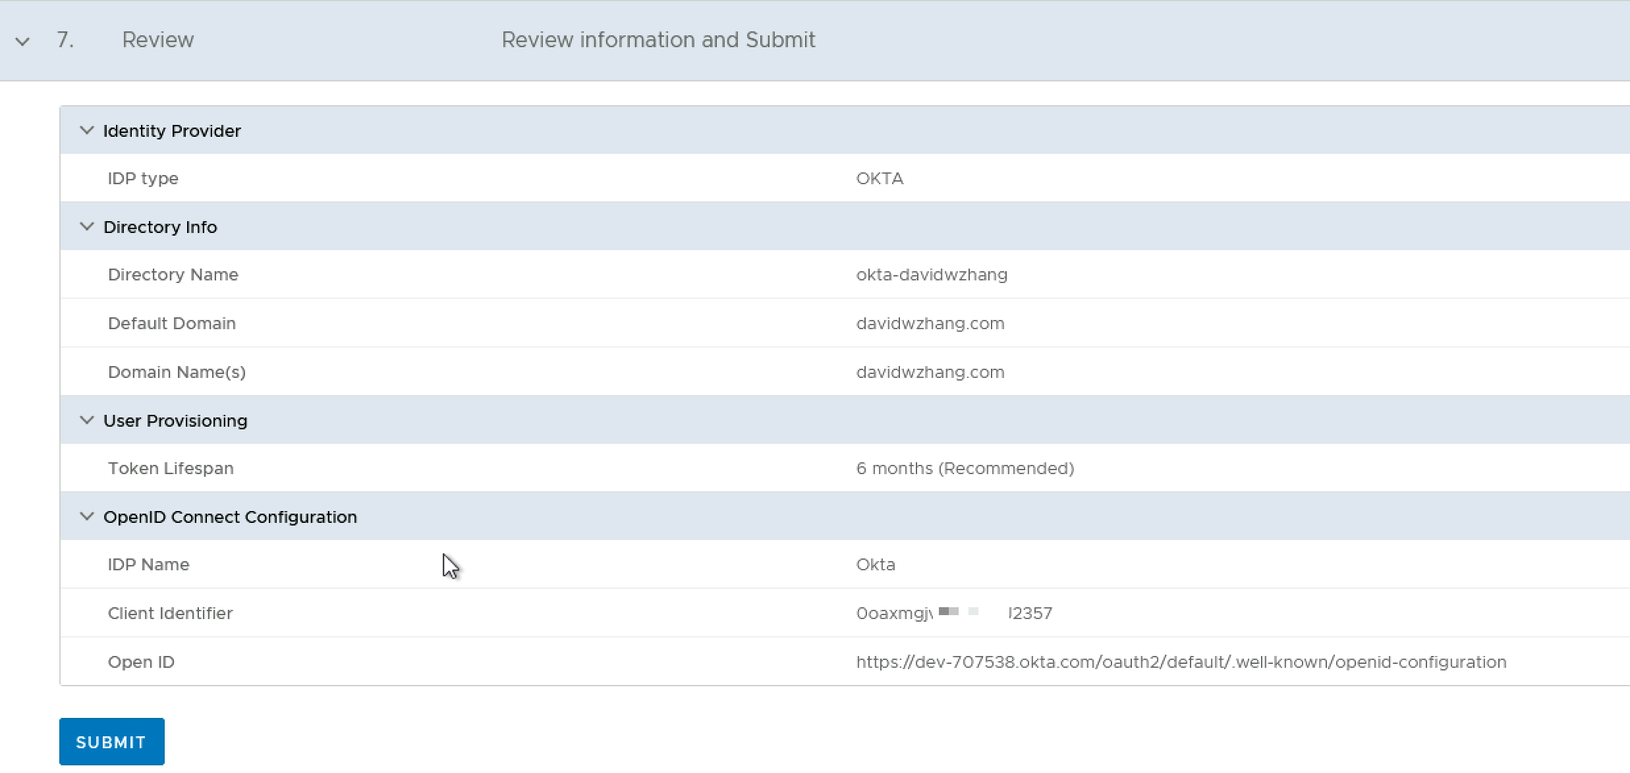
After the submission of the config, VCF SDDC Manager will generate Tenant URL and Secret Token which will be used by Okta SCIM2.0 for user provisioning. Please check Section 2.2 for further details.
SDDC Manager/vCenter/NSX Role Assignment
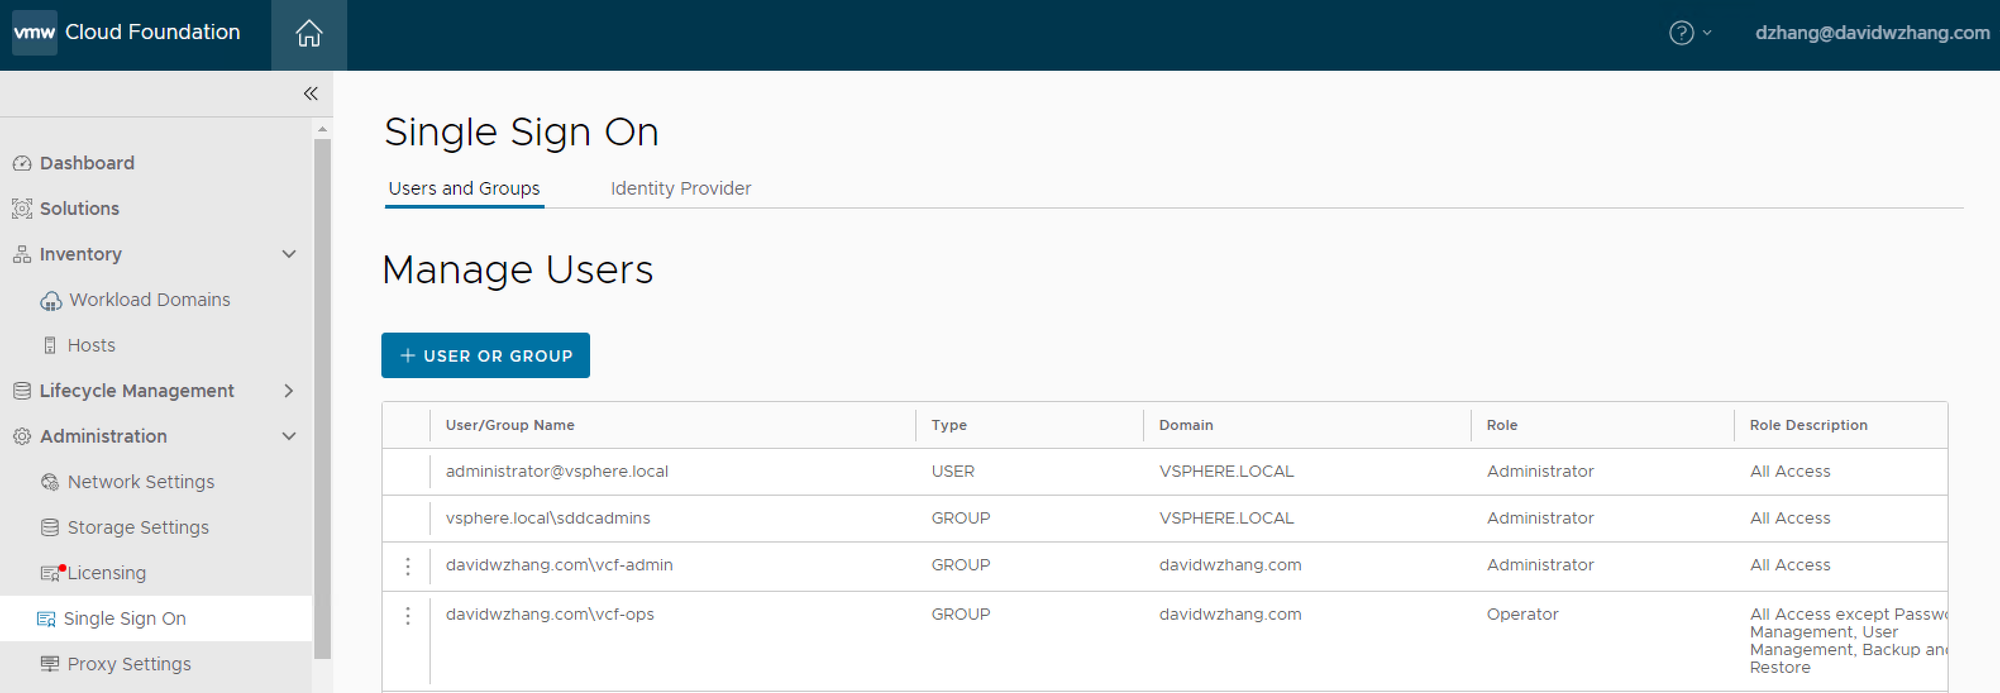
SDDC Manager Role Assignment
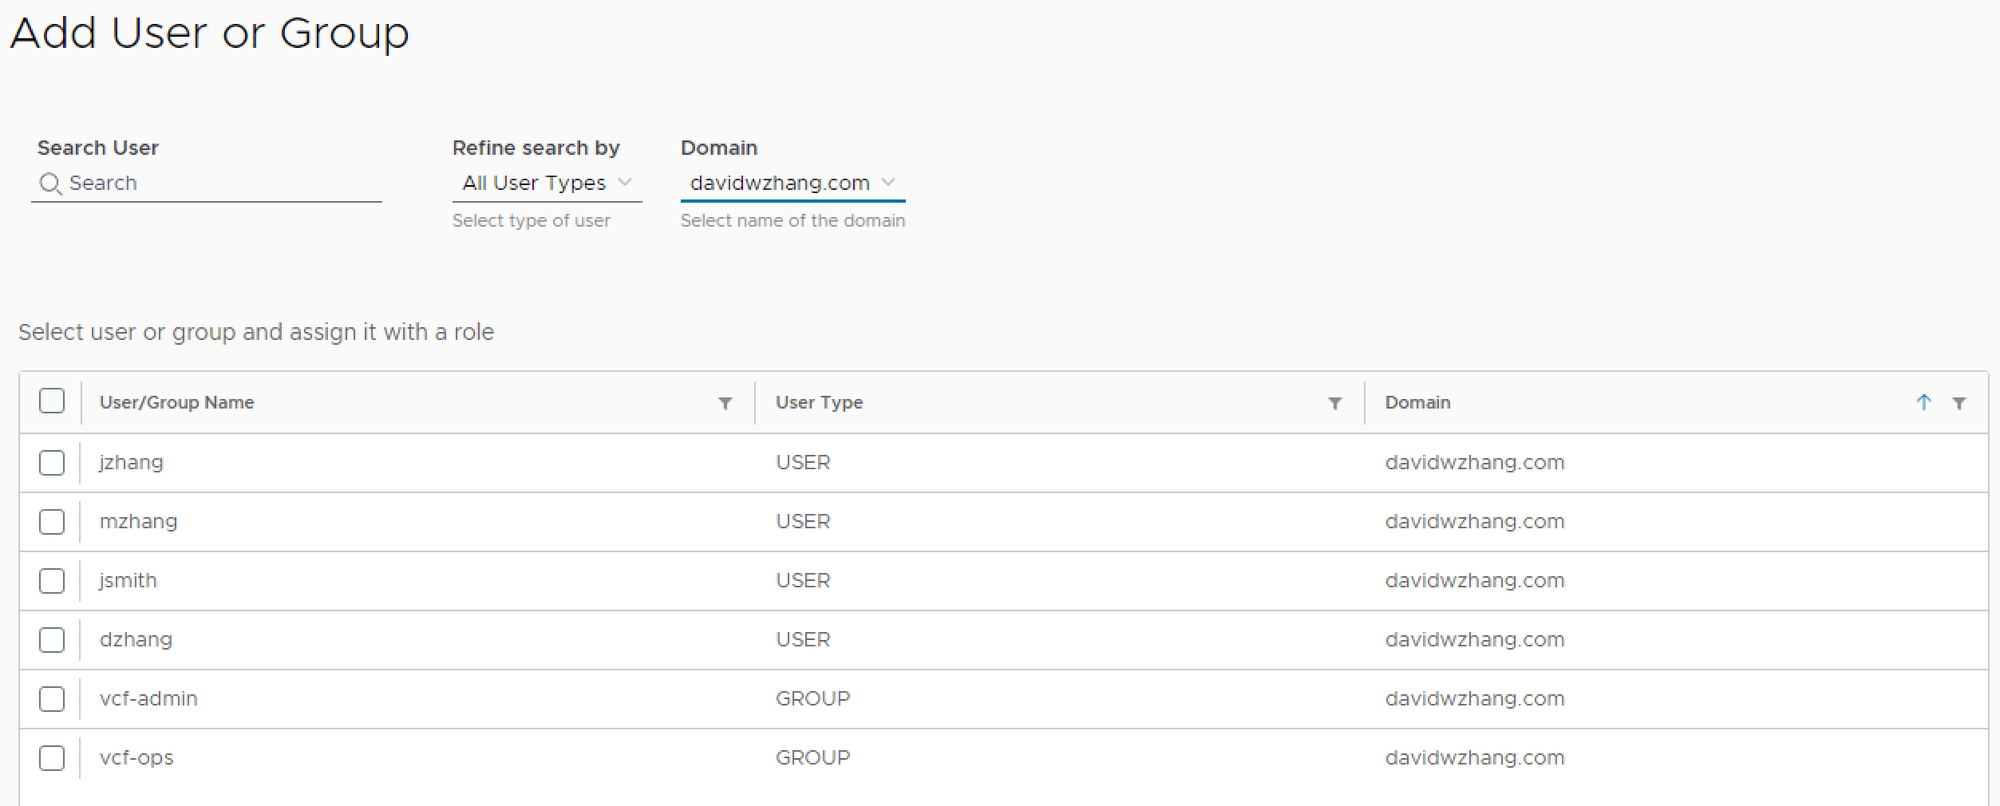
Add User or Group. Two groups (vcf-admin and vcf-ops) are added and assigned roles.


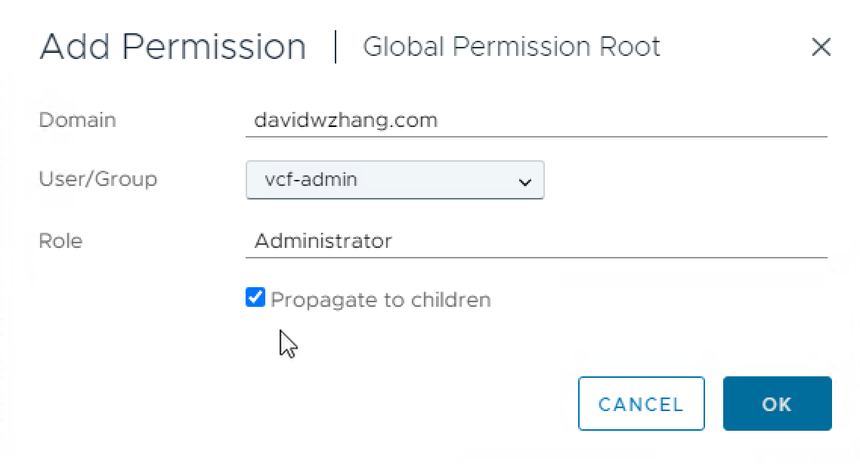
vCenter Role Assignment
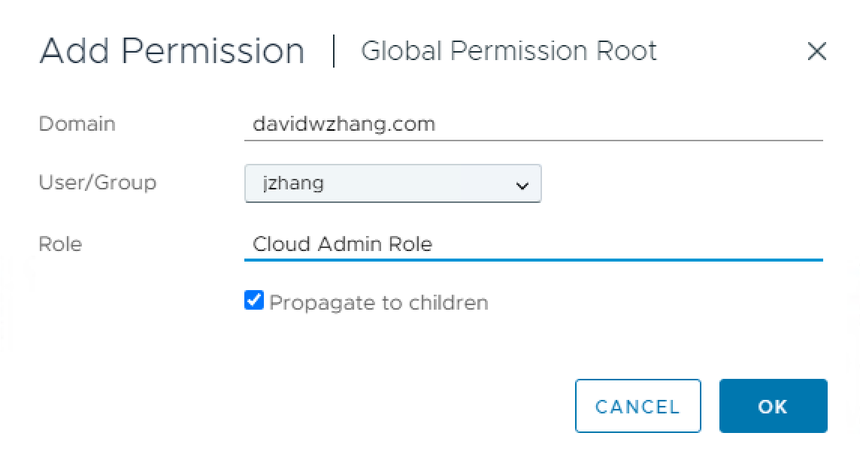
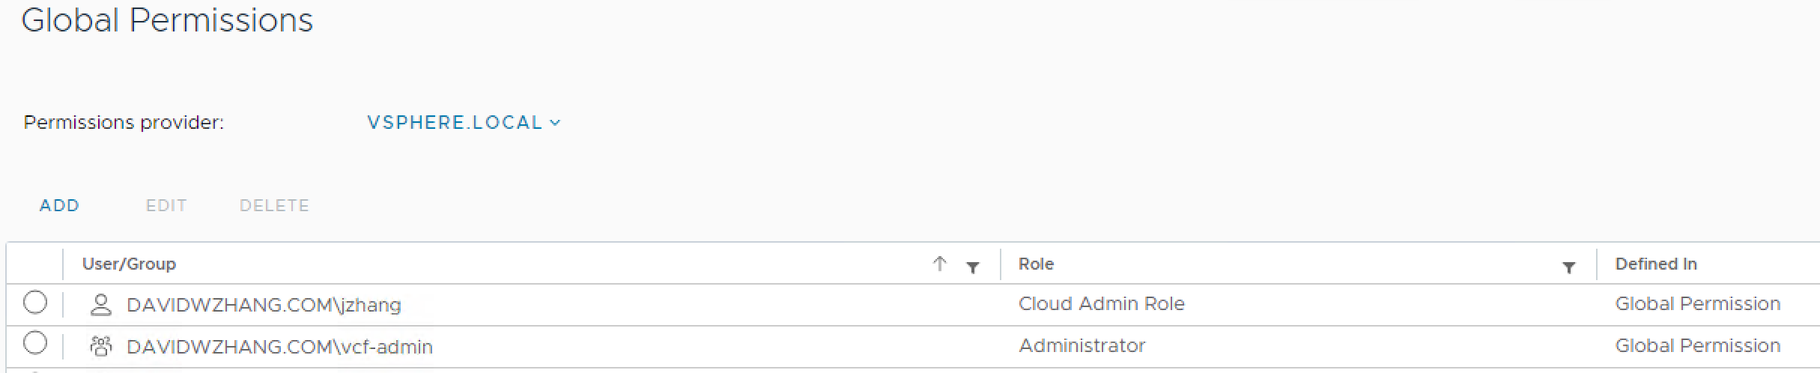
You can assign a vCenter role to an AD group or a user. Here we will assign the Administrator role to vcf-admin group and Cloud Admin Role to a user.
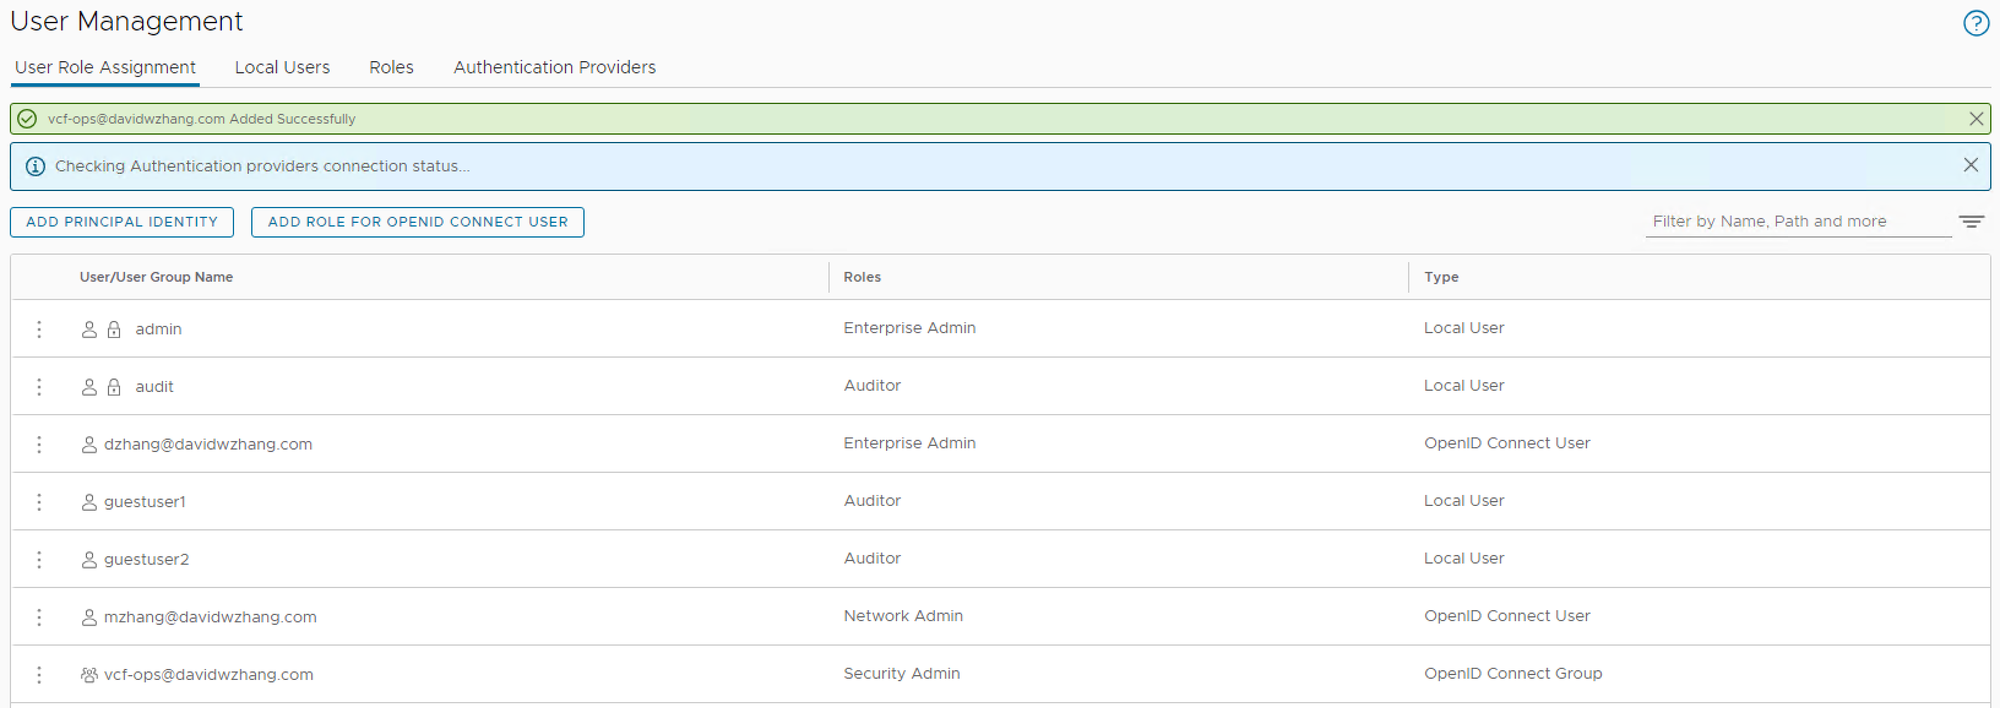
NSX Manager Role Assignment
Here we will assign different NSX roles to different users based on their job responsibilities.
SSO Login
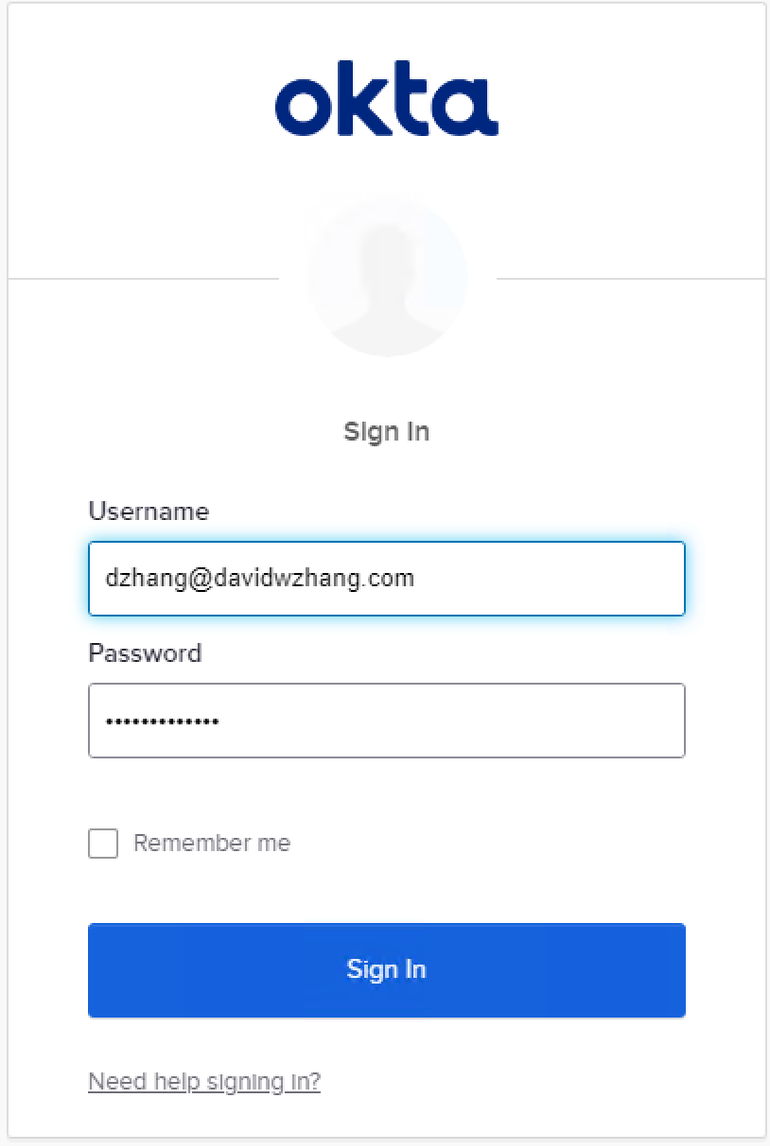
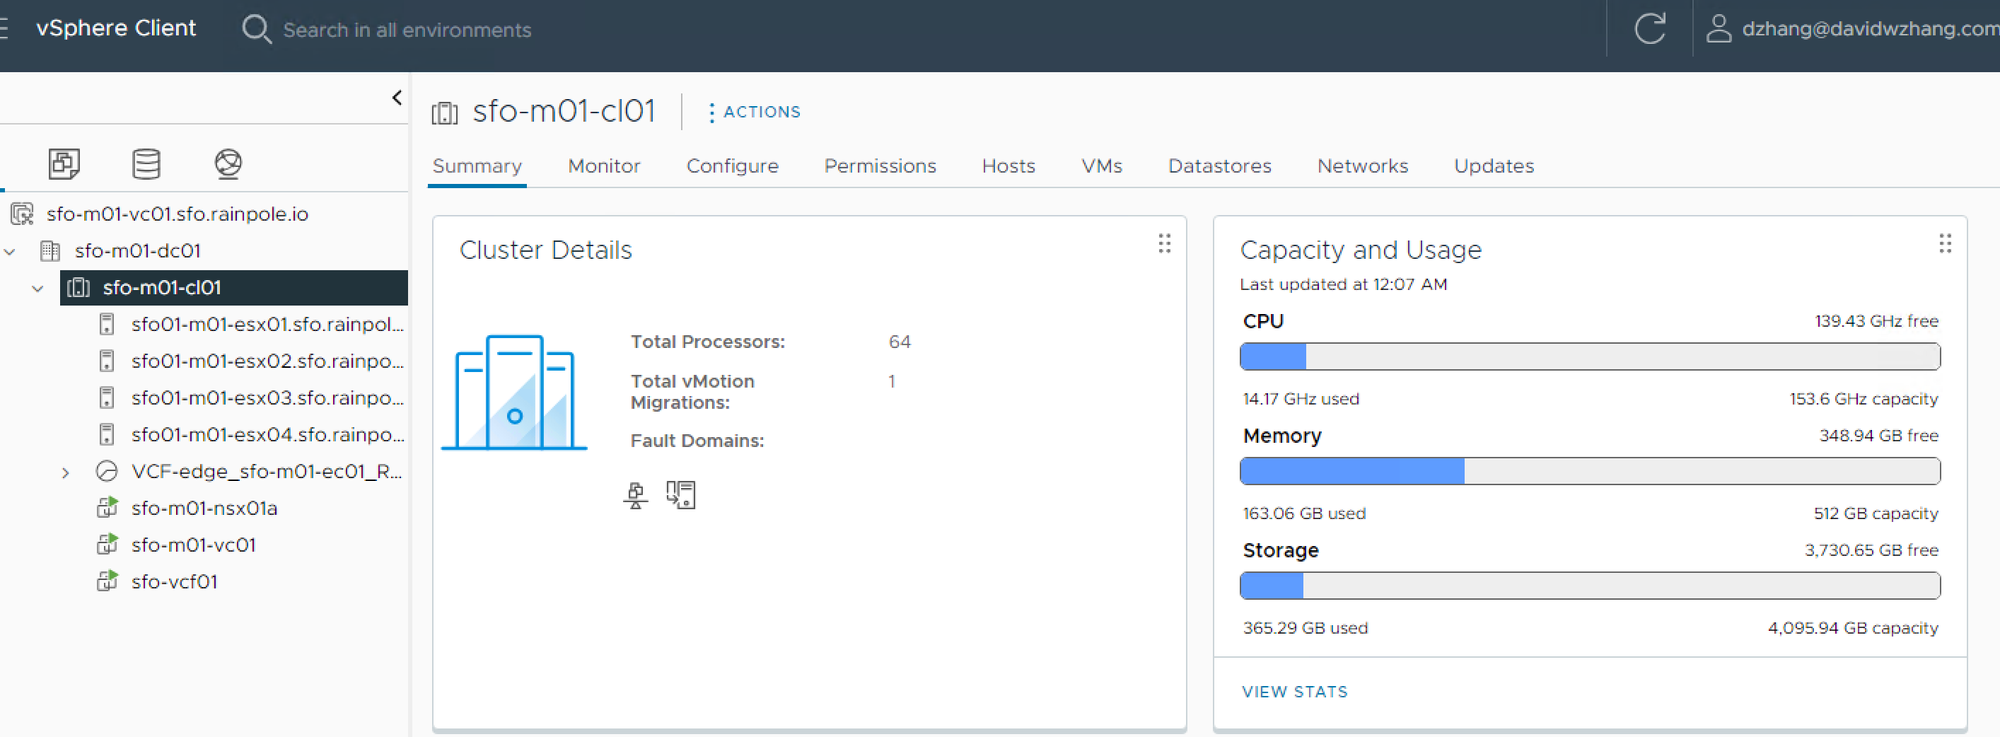
The screen captures below show successful logins to VCF 5.1 SDDC Manager, vCenter, and NSX Manager.
SDDC Manager
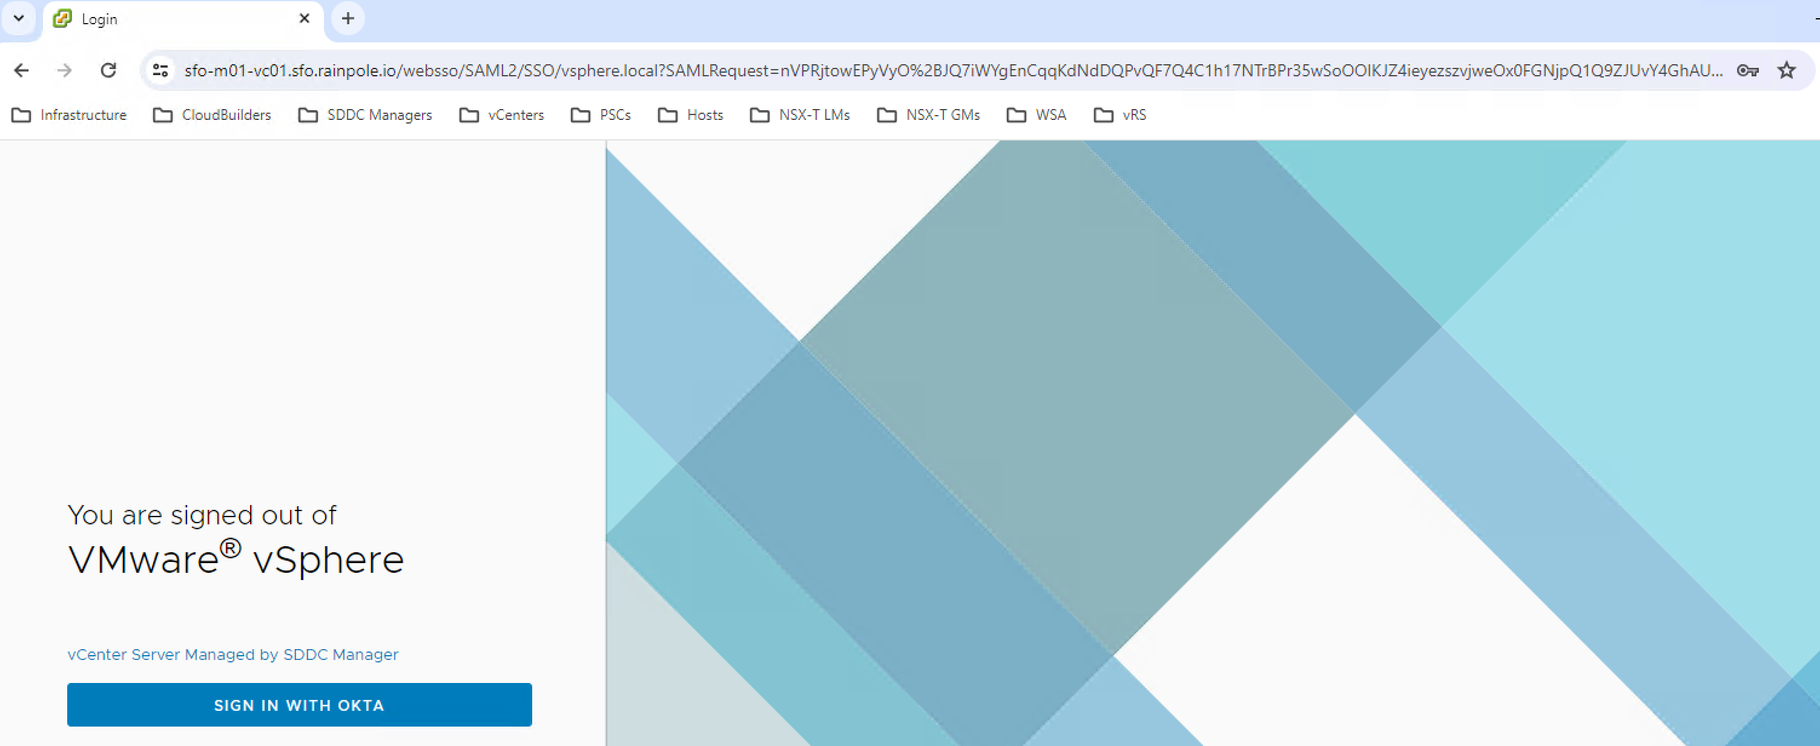
vCenter
NSXM

Thank you for your reading!
