
In VMC on AWS SDDC, you can extend your on-premise network to VMC SDDC via HCX or L2VPN.
In this blog, I will show you how to set up L2VPN in VMC on AWS to extend network VLAN 100 to SDDC.
This blog is for VMC SDDC, running at version 1.9, which is backed by NSX-T 2.5. The SDDC end will work as a L2VPN server and your on-premise NSX autonomous edge will work as a L2VPN client.
Prerequisite
- UDP 500/4500 and ESP (IP Protocol) are allowed from the On-premise L2VPN client to the VMC SDDC L2VPN Server
Let’s start the setup from the VMC SDDC end.
Section 1: Set up L2VPN at VMC SDDC End
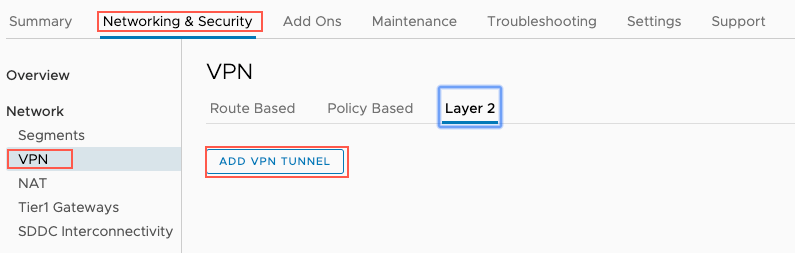
Step 1: Log in to your VMC Console, go to Networking & Security—>Network—>VPN—>Lay2 and click “ADD VPN TUNNEL”.
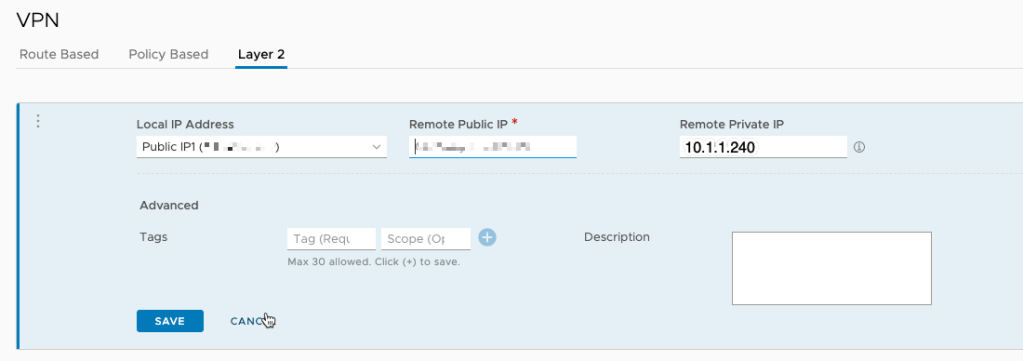
Select Public IP from the local IP Address drop-down and input the public IP of L2VPN’s remote end. As on-premise NSX Edge is behind a NATed device, the remote private IP is required. In my case, the remote private IP is 10.1.1.240.
Step 2: Create an extended network.
Go to Network—>Segment and add a new segment as below.
- Segment Name: l2vpn;
- Connectivity: Extended;
- VPN Tunnel ID: 100 (please note that the tunnel ID needs to match the on-prem tunnel ID)

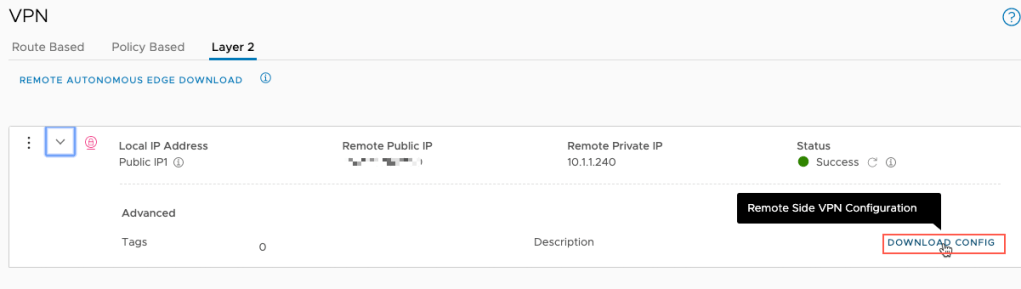
After the network segment is created, you will see the below in layer 2 VPN.

Now we can begin to download the AUTONOMOUS EDGE from the highlighted hyperlink above.
While the file is downloading, we can download the peer-code which will be used for authentication between on-premise L2VPN client and SDDC L2VPN server.
The downloaded config is similar to below:
[{"transport_tunnel_path":"/infra/tier-0s/vmc/locale-services/default/ipsec-vpn-services/default/sessions/7998a0c0-52b7-11ea-b949-d95049696f90","peer_code":"MCxiNmY2NTg1LHsic2l0ZU5hbWUiOiJMMlZQTiIsInNyY1RhcElwIjoiMTY5LjI1NC4yMC4yIiwiZHxxxxxxxxxxxxxxxxxGgxNCIsImVuY3J5cHRBbmREaWdlc3QiOiJhZXMtZ2NtL3NoYS0yNTYiLCJwc2siOiJOb25lIiwidHVubmVscyI6W3sibG9jYWxJZCI6IjEwLjEuMS4yNDAiLCJwZWVySWQiOiI1Mi4zMy4xMjAuMTk4IiwibG9jYWxWdGlJcCI6IjE2OS4yNTQuMzEuMjU0LzMwIn1dfQ=="}]Section 2: Deploy and Setup On-premise NSX autonomous edge
Step 1: Prepare Port Groups.
Create 4 port-groups for NSX autonomous Edge.
- pg-uplink (no vlan tagging)
- pg-mgmt
- pg-trunk01 (trunk)
- pg-ha
We need to change the trunk port-group pg-trunk01 security setting to accept promiscuous mode and forged transmits. This is required for L2VPN.
Step 2: Deploy NSX Autonomous Edge
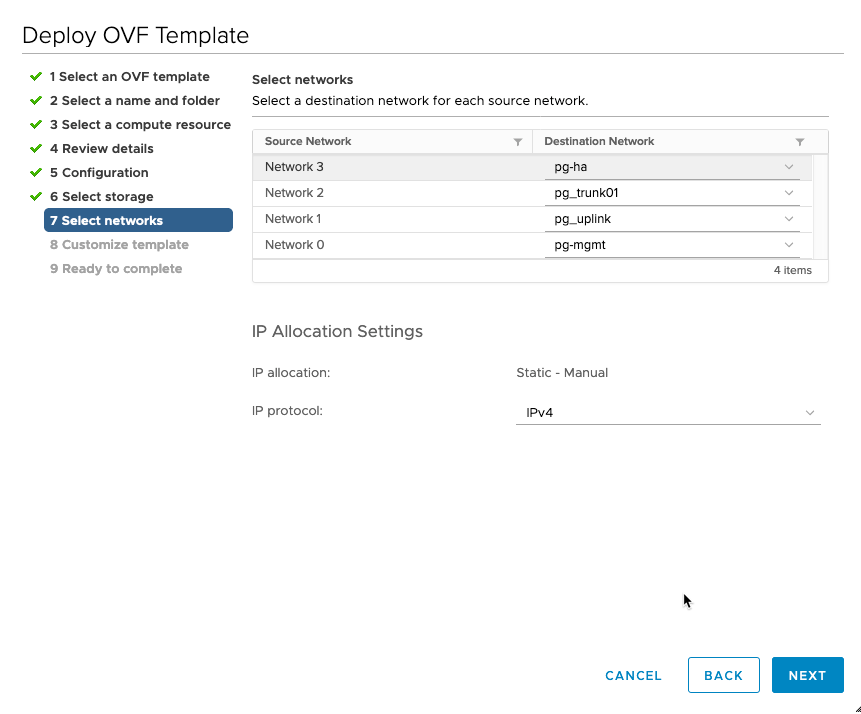
We follow the standard process to deploy an OVF template from your vCenter. In “Select Network” of the “Deploy OVF Template” wizard, map the right port-group to different networks. Please note Network 0 is always the management network port for the NSX autonomous edge. To make it simpler, I only deployed a single edge here.
The table below shows the interface/network/adapter mapping relationship in different systems/UI under my setup.
| Edge CLI | Edge VM vNIC | OVF Template | Edge GUI | Purpose |
| eth0 | Network Adapter1 | Network 0 | Management | Management |
| fp-eth0 | Network Adapter2 | Network 1 | eth1 | Uplink |
| fp-eth1 | Network Adapter3 | Network 2 | eth2 | Trunk |
| fp-eth2 | Network Adapter4 | Network 3 | eth3 | HA |
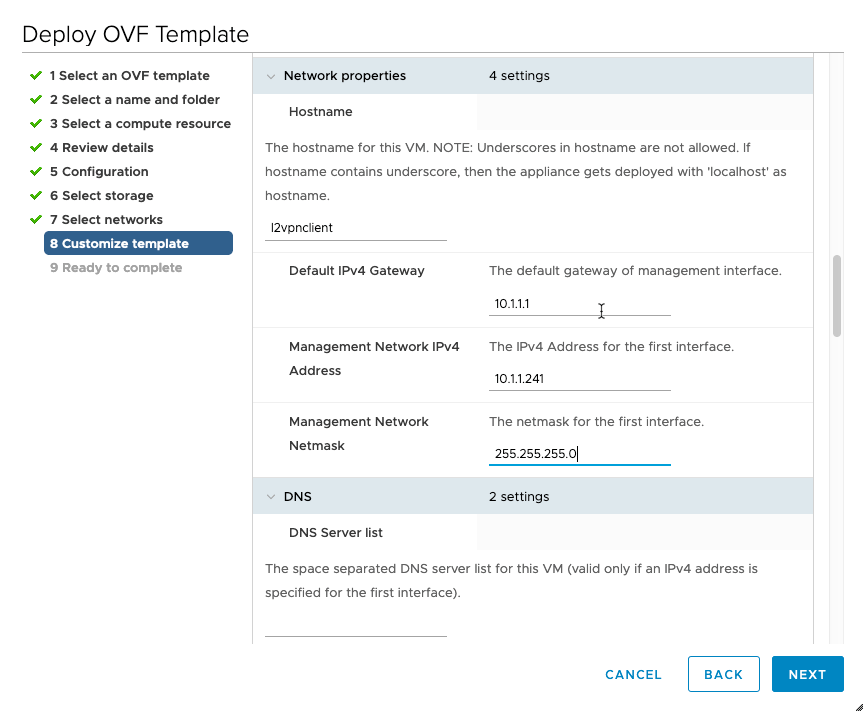
In the “Customize template” section, provide the password for the root, admin and auditor.

Input hostame(l2vpnclient), management IP (10.1.1.241), gateway (10.1.1.1) and network mask (255.255.255.0).
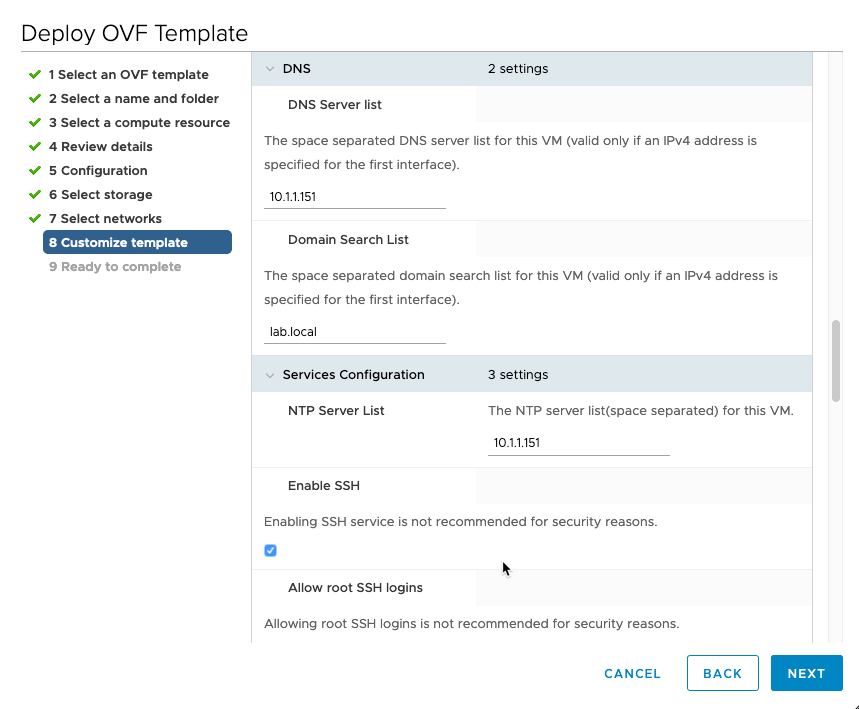
Input DNS and NTP setting:
Provide the input for external port:
- Port: 0,eth1,10.1.1.240,24.
- VLAN 0 means no VLAN tagging for this port.
- eth1 means that the external port will be attached to eth1 which is network 1/pg-uplink port group.
- IP address: 10.1.1.240
- Prefix length: 24
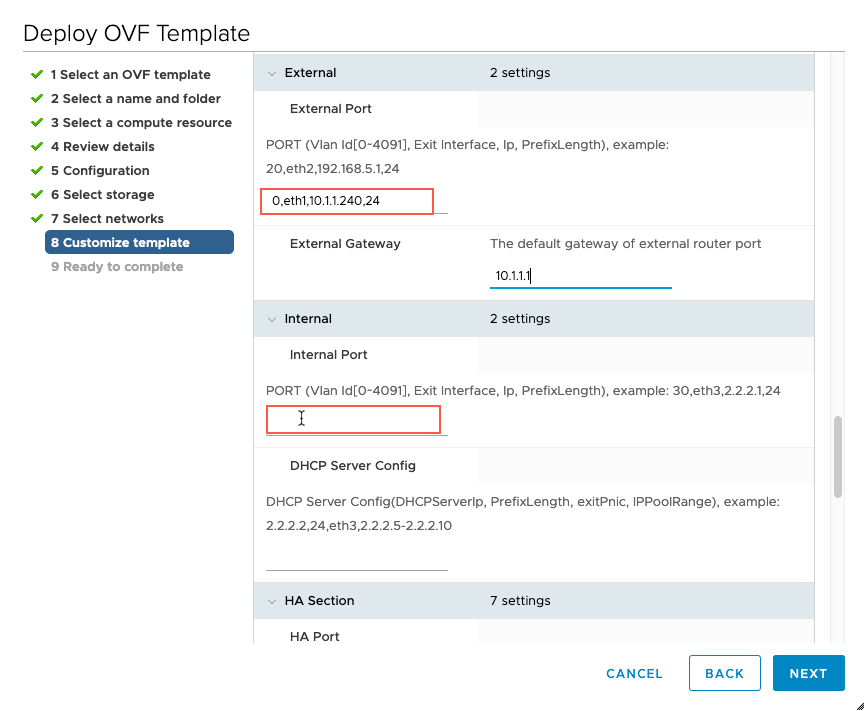
There is no need to set up the Internal Port for the autonomous edge deployment. So I left it as blank.
Step 3: Autonomous Edge Setup
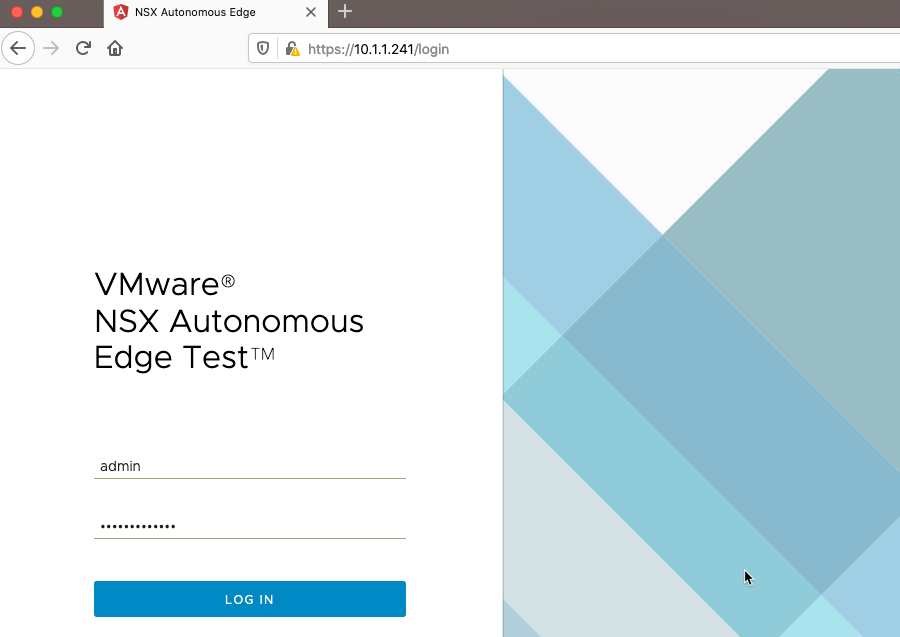
After the edge is deployed and powered on, you can log in to the edge UI via https://10.1.1.241.
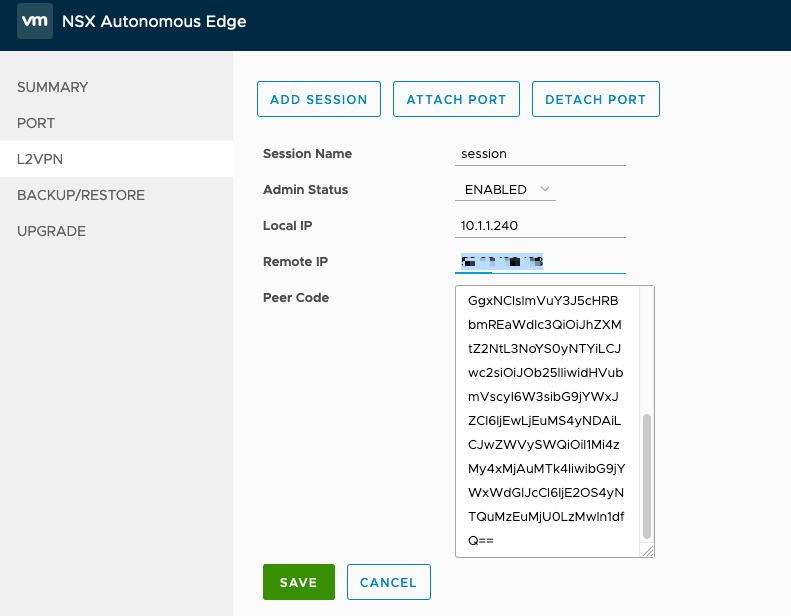
Go to L2VPN and add a L2VPN session, input the Local IP (10.1.1.240), Remote IP (SDDC public IP) and Peer Code which I got from the downloaded config in section 1.
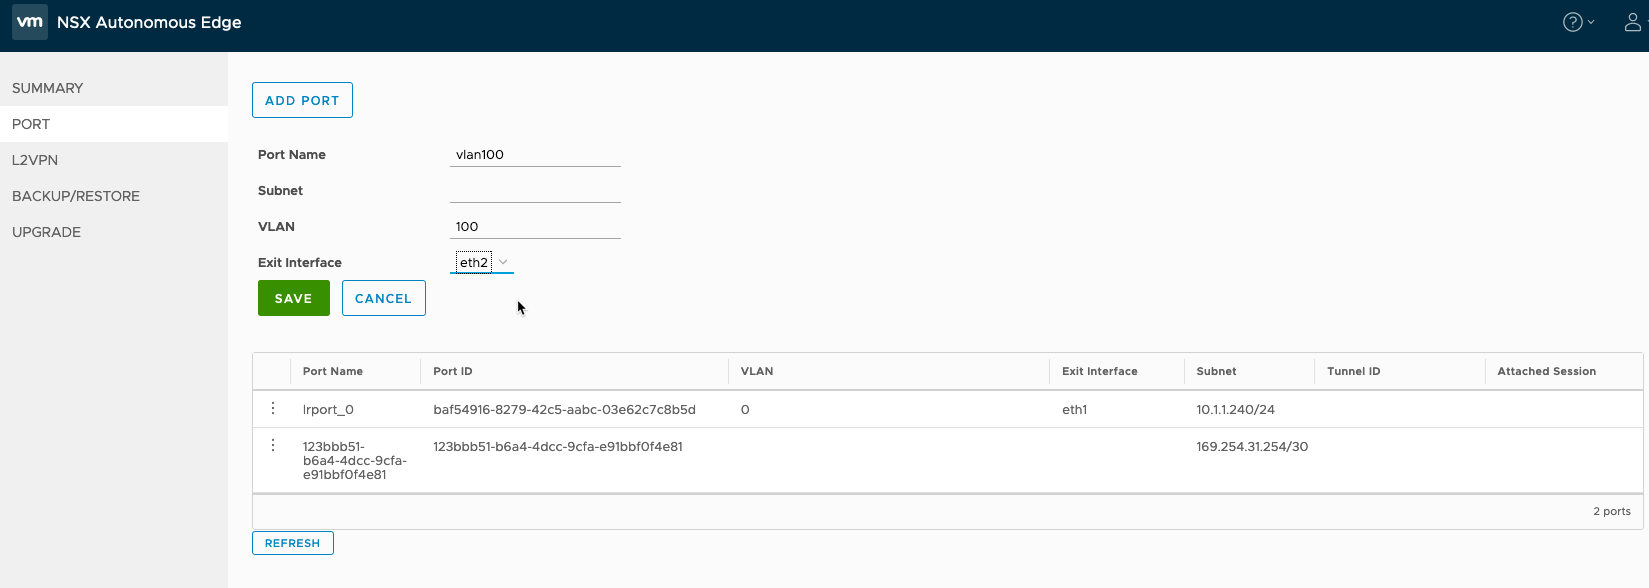
Go to Port and add port:
- Port Name: vlan100
- Subnet: leave as blank
- VLAN: 100
- Exit Interface: eth2 (Note: eth2 is connected to the port-group pg-trunk01).
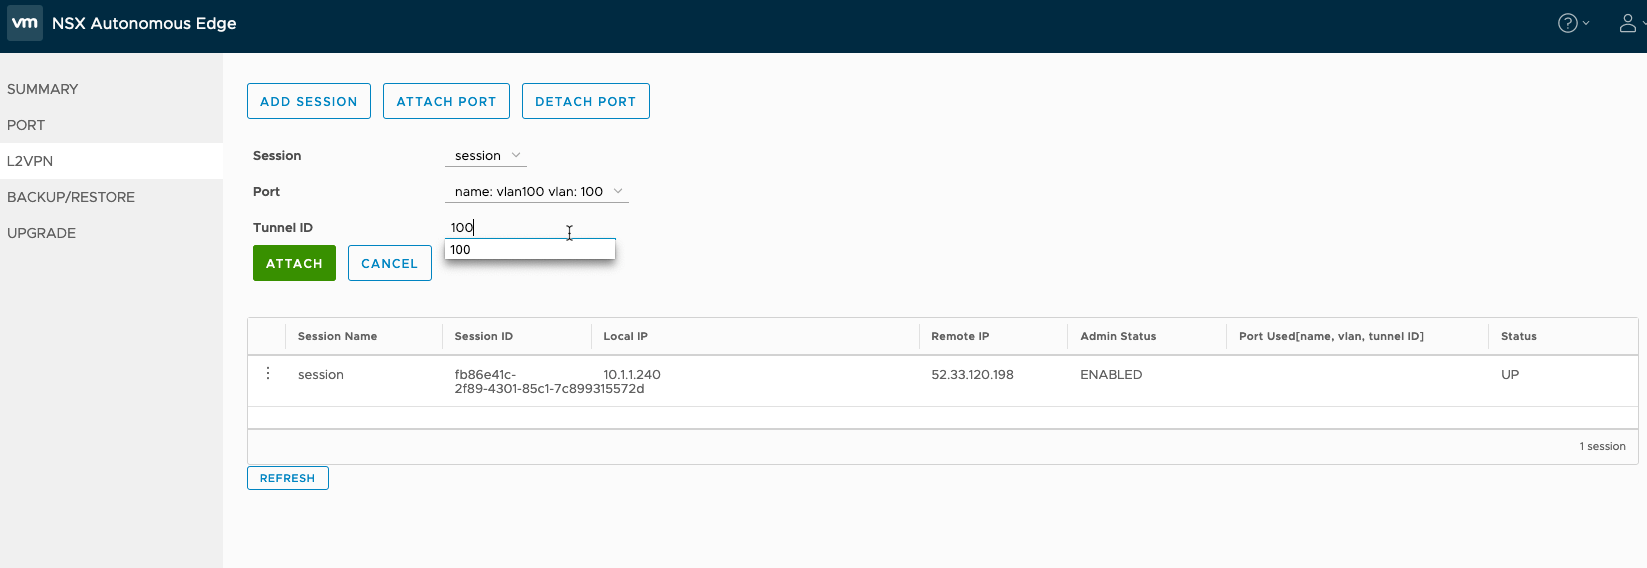
Then go back to L2VPN and attach the newly created port VLAN100 to the L2VPN session as below. Please note that the Tunnel ID is 100, which is the same tunnel ID as the SDDC end.
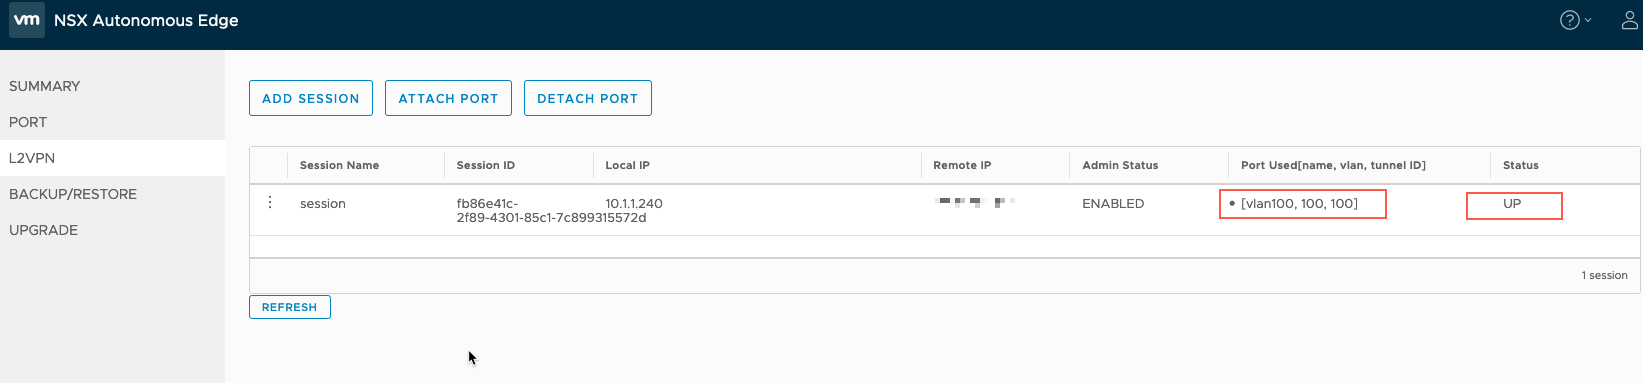
After the port is attached successfully, we will see something similar to below.
This is the end of this blog. Thank you very much for reading!

Pingback: L2VPN in VMC on AWS | Aaron Dumbrow Random Thoughts
Pingback: How to Set Up an L2VPN on Custom T1 in a VMware Cloud on AWS SDDC – davidwzhang.com
This is a very helpful guide on how to set up L2VPN in VMC.
LikeLiked by 1 person