
The Federated Identity feature of VMware Cloud on AWS can be integrated with all 3rd party IdPs who support SAML version 2.0. In this integration model, the customer dedicated vIDM tenant will work as SAML Service Provider. If the 3rd party IdP is set up to perform multi-factor authentication (MFA), the customer will be prompted MFA for access to VMware Cloud services. In this blog, the integration with one of the most popular IdP PingOne will be demoed.
Disclaimer:
- The PingOne for Enterprise settings in this blog are to demo the integration for vIDM, which may not be the best practise for your environment or meet your business and security requirements.
- VMware Cloud on AWS has begun to support self-service enterprise federation setup since Oct 2021. The set-up UI is different from what the blog shows but the configuration is essentially the same. Please update the settings accordingly based on the latest UI.
Note: If you would like to use the vIDM connector for users/groups sync, please complete the vIDM connector installation and the vIDM tenant basic setup as per my first blog of this series before continuing.
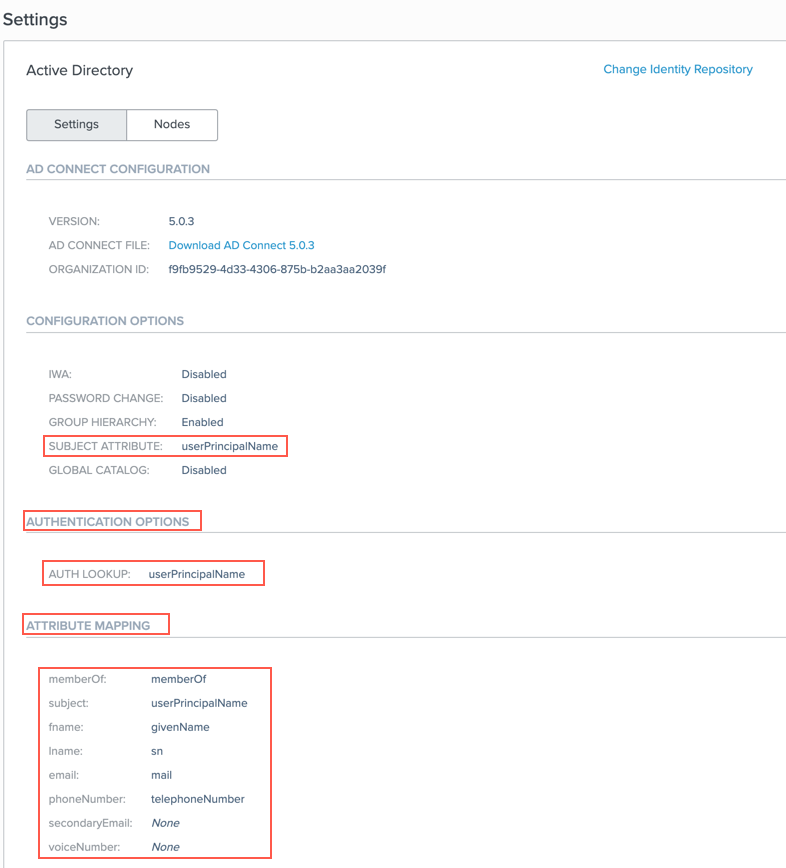
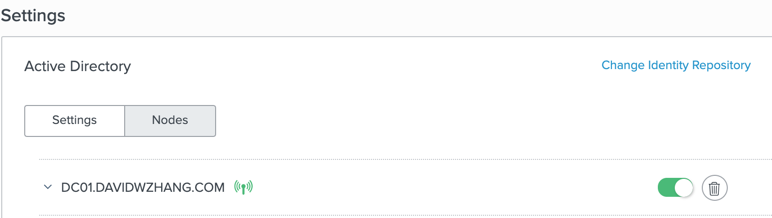
To sync the corporate Active Directory users to PingOne, we will need to install the identity bridge PingOne AD Connect. The PingOne AD Connect installation is quite straightforward. You can follow the installation guide to complete the installation. Here, I synced my AD davidwzhang.com to PingOne for Enterprise with AD connect. Below is my AD connect setup for your reference:
Once the domain users are synced, you will be able to see your AD user groups and users information in PingOne Console’s User tab like below:


Now it is time to set up the SAML Application in PingOne for Enterprise.
Go to the PingOne console application tab and click “Add Application” to add an SAML application under “My Applications”

Select “New SAML Application”

Input the Application Name, Application Description and Category then continue to next step.

To provide the required information in the Application Configuration page, we need to get the metadata from your vIDM tenant.

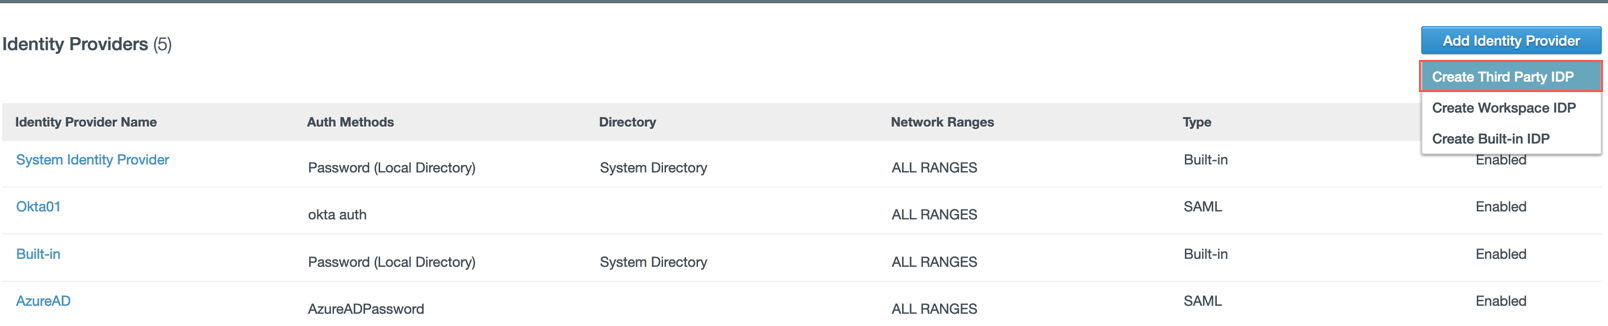
Go to the vIDM tenant administrator console and click “Add Identity Provider” and select “Create Third Party IDP” within the “Identity & Access Management” tab.
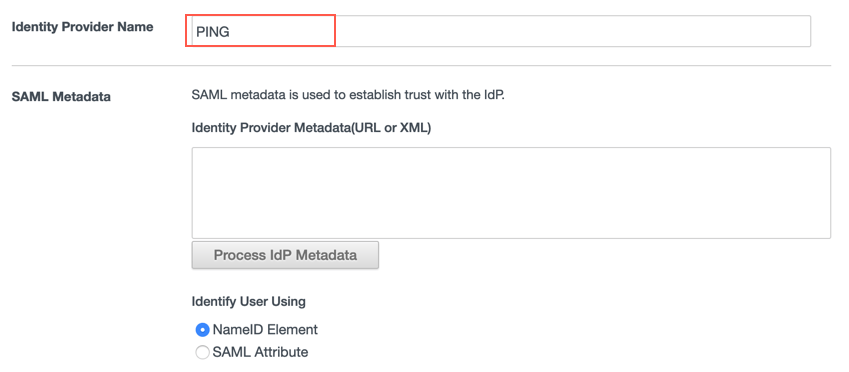
Type in the “Identity Provider Name”, here we use “PING” as the IdP name.
Go to the bottom of this IdP creation window and right click “Service Provider (SP) Metadata” and select “Copy link Location”.

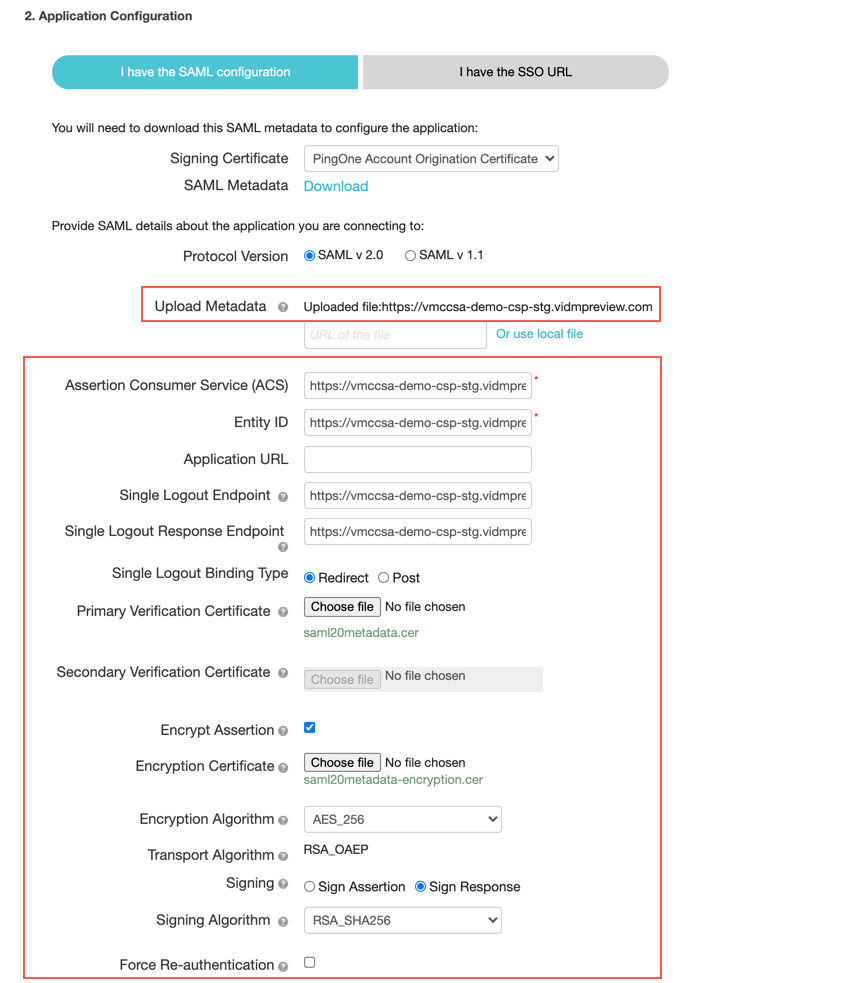
Now go back to the PingOne Console’s Application Configuration window and paste the URL of vIDM SP metadata. You will see all required SAML configurations have popped up. Now please click the “Continue to Next Step” button.
In the SSO Attribute Mapping window, click “Add new attribute”

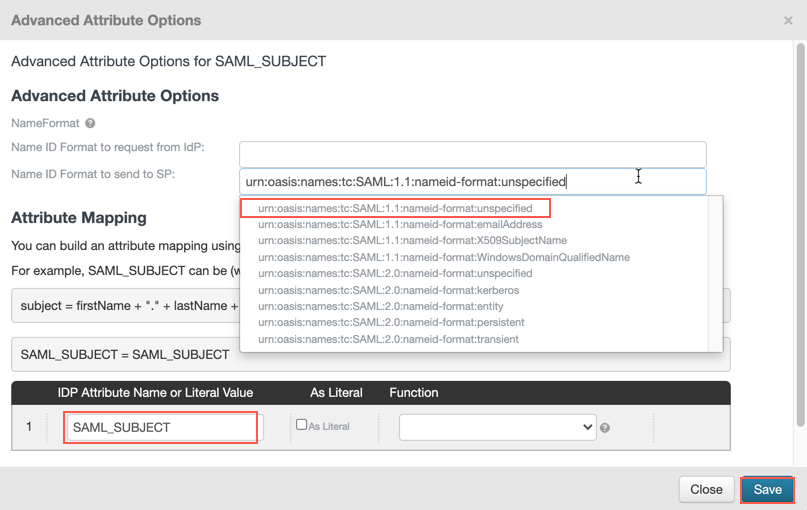
Type “SAML_SUBJECT” in Application Attribute column and click “Advanced”.

A new window will pop as below. Select “urn:oasis:names:tc:SAML:1.1:nameid-format:unspecified” from the drop down menu of “Name ID Format to send to SP” and input “SAML_SUBJECT” in the “IDP Attribute Name or Literal Value” column then save the configuration.
Click “Continue to Next Step”

Add AD groups sddc-admins and sddc-operators to this SAML application.

Now the two AD groups are linked to the SAML application. Click “Continue to Next Step”

In the Review Setup window, review the setup and finish the SAML configs in PingOne. Please copy the SAML Metadata URL from the review page.

Go to the vIDM third party IdP creation window and paste the PingOne IdP metadata URL into SAML Metadata and click “Process IdP Metadata”.

Update the “Name ID format mapping from SAML Response” as below:
Name ID Format: "urn:oasis:names:tc:SAML:1.1:nameid-format:unspecified"
Name ID Value: userPrincipalName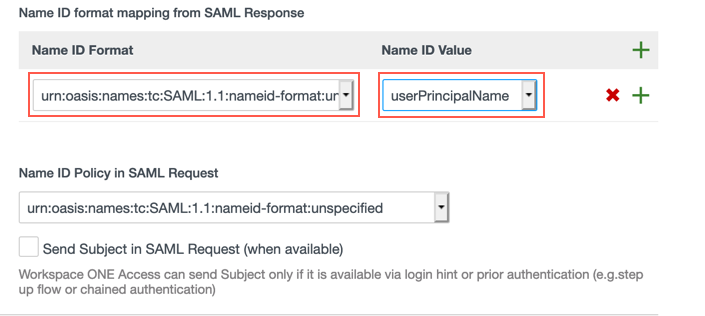
Select “davidwzhang.com” directory as users who can authenticate with this new 3rd party IdP and leave the Network as default “All RANGES”. Then create a new authentication method called “PingOnePassword” with SAML Context “urn:oasis:names:tc:SAML:2.0:ac:classes:PasswordProtected“. Please note that the name of this newly created authentication method has to be different from any existing authentication method. Then leave all other configuration items’ box unchecked and click Add.

The 3rd party IdP has been successfully added now.

The last step of vIDM set up for this PingOne integration is updating the default access policy to use the newly defined authentication method “PingOnePassword”. Please follow the steps in my previous blog to perform the required update. The updated default access policy should be similar as below.

Finally, we are ready to test the integration.
Open a new Incognito window in a Chrome browser and type in the vIDM tenant URL then click Enter.
In the log in window, type user name jzhang@davidwzhang.com and click Next.

The authentication session is redirected to PingOne.
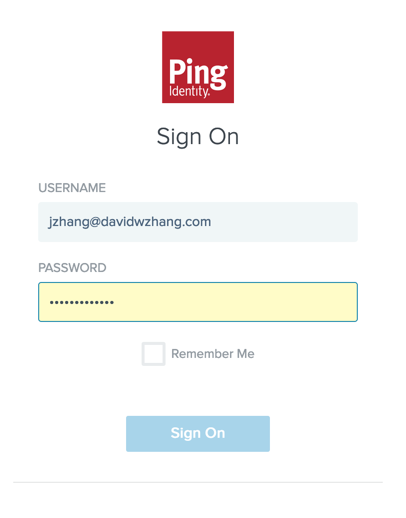
Then user Jonathan Zhang (jzhang@davidwzhang.com) successfully logged into the vIDM tenant.

This is the end of this demo. Thank you very much for reading!
